

How Load Calculation Helps Choose the Right Inverter for Home
Home How Load Calculation Helps Choose the Right Inverter for Home by How Load Calculation Helps Choose the Right Inverter for Home Imagine this: You buy a powerful inverter, but when the next power cut strikes, it fails to keep even the light bulbs lit. Why? Because the inverter was undersized — it didn’t match your home’s load. That’s where inverter load calculation for home comes in. With proper load calculation, you ensure your inverter can handle your appliances during outages. In this article, we explain how to calculate inverter load, why it matters, and how it guides your inverter purchase. We also showcase Livfast options you can trust. What is Inverter Load Calculation? Inverter load calculation for home means estimating the total power demand that the inverter must support. Put simply: Total Load (Watts) = Sum of all appliance wattages Required Inverter Rating = Total Load × Safety Margin (e.g. 1.25 or 1.3) That way, your inverter is never overworked. Sites like Lento India suggest multiplying your total load by 1.25 when choosing UPS or inverter capacity. This process is sometimes offered online as an inverter size calculator tool. Why Do You Need Load Calculation? Skipping load calculation can lead to several problems: The inverter might overload and shut off. The battery backup time will fall short. Frequent breakdowns or overheating may occur. You may waste money on a much larger inverter than needed. On the other hand, correct inverter load calculation for home ensures: Reliable backup during blackouts Efficient inverter battery usage Longer life for both the inverter and the battery Cost-effective purchase (no overspending) How to Calculate Inverter Load: Step by Step Here’s a simple, practical method (no technical jargon) to help you with inverter load calculation for home: Step 1: List Appliances You Want to Back Up Decide which lights, fans, TV, refrigerator, etc., should run during blackout. Don’t include every appliance — just essentials. Step 2: Note Their Wattage Check labels on appliances (or manuals) for power rating in watts (W). If the rating is in amps and volts (e.g. 5A, 220V), multiply:Watts = Amps × Volts Step 3: Add Them Up Add the wattages of all selected appliances. This gives you ‘Total Load’ (Watts). Step 4: Apply Safety Margin Multiply Total Load by a safety factor (like 1.2 or 1.25). This accounts for extra load, fluctuations, and future expansion. Example: If your sum is 800 W, the inverter rating needed = 800 × 1.25 = 1000 W Step 5: Match Inverter Rating Choose an inverter whose watt rating (or VA rating) is equal to or higher than the calculated value.Some online inverter size calculator tools help automate this with a user interface. Sample Load Calculation Appliance Wattage (W) Quantity Total (W) LED Bulb 10 W 6 60 W Ceiling Fan 60 W 2 120 W Tube Light 18 W 3 54 W Television 80 W 1 80 W Refrigerator 200 W 1 200 W Sum of Load 514 W Safety Margin (×1.25) 643 W In this example, you’d pick an inverter rated 700 W (or more) as per your backup needs. Things to Watch Out for When Doing Load Calculation Starting Surge: Some appliances, like the fridge, motor, etc., draw more power on startup. So, it is best to choose an inverter that can absorb surges Continuous vs Peak Load: Distinguish between constant load and occasional peaks. Battery Backup Time: The more load you ask, the shorter backup time you’ll get. Efficiency Loss: Inverters aren’t 100% efficient. Factor in 80–90% efficiency loss. Future Addition: Leave some buffer in your calculation for adding more appliances later. Livfast Inverter Options to Match Your Calculated Load Once you’ve done your inverter load calculation for home, you need reliable devices that match or exceed your requirements. Livfast offers a range of home inverters built to complement these calculations. Some Livfast inverter features: Rated for different loads: From smaller 600–1000 W units to higher-capacity models. Pure sine wave technology: Ensures safe power for sensitive appliances. Overload protection & surge tolerance: Handles startup surges intelligently. Fast charging and efficient designs: Reduces battery stress and extends backup. Choosing a Livfast inverter that matches your calculated load ensures you get the right power without overpaying. Practical Tips to Improve Inverter Performance After Load Calculation Once you have the right sized inverter, follow these practices: Turn off unnecessary appliances to reduce load. Use energy-saving LED bulbs and efficient appliances. Avoid frequent switching on/off as it causes surges. Maintain batteries well to preserve capacity. Keep the inverter ventilated and avoid heat build-up. Moreover, with proper usage, your correctly sized inverter will last longer and deliver smooth backup. Conclusion A major part of choosing the right inverter for home is the load calculation. This pre-buying step helps save the hassle that might arise later from an underperforming or overburdened inverter. A few minutes spent on accurate inverter load calculation today can save you countless hours of frustration tomorrow! Related Blogs Inverter Battery Capacity GuideInverter Buying Guide FAQ’s General What is the meaning of inverter load calculation for home? It’s the process of estimating how much power (in watts) your essential appliances will need during a blackout, so you choose an inverter that can safely support that load. Is this Helpful? Can I use a smaller inverter than the calculated load? You can, but that risks overloading, premature failures, or very limited backup time. It’s always safer to choose a unit with a higher rating. Is this Helpful? Does inverter load calculation include battery size? No, load calculation helps choose inverter rating. Battery size is separate and depends on desired backup hours, but you’ll often pair both in system selection. Is this Helpful? What is the meaning of inverter load calculation for home? It’s the process of estimating how much power (in watts) your essential appliances will need during a blackout, so you choose an inverter that can safely support that load. Is this Helpful? Can I use a smaller inverter

How to Choose the Right Battery for Your Bike
Home How to Choose the Right Battery for Your Bike by How to Choose the Right Battery for Your Bike You need a battery that never leaves you and your bike struggling to start on cold mornings. You also would not love to see dimmed headlights too often. All of it is dependent on your battery. If it is the right one, every electrical action lies in place. The best battery for bike is not just the one that will fit in that allotted place. Why? There are some more battery details that need your attention while you are about to make a purchase. An everyday commuter or a weekend rider all need a bike battery that makes their rides easy and worry-free. So, read the bike battery buying guide to know the basics of what it takes when you are about to purchase a battery for your bike. Why the Right Bike Battery Matters A bike’s battery powers more than just ignition. From headlights and indicators to digital consoles and electric start systems — the right battery ensures every ride is effortless. A poor-quality or mismatched battery can lead to: Starting troubles Dim or flickering lights Poor mileage due to electrical inefficiency Unexpected breakdowns That’s why choosing the best battery for bike ensures not only performance but also peace of mind. Understanding Different Types of Bike Batteries Here’s a quick guide to help you understand the most common battery types and their pros and cons: Battery Type Pros Cons Best For Lead-Acid Battery Affordable, Reliable Heavy, Needs maintenance Entry-level bikes Maintenance-Free (MF) Battery No topping up needed, Leak-proof Slightly higher cost Daily commuters Lithium-Ion Battery Lightweight, Long life, Fast charging Higher upfront cost Premium motorcycles, performance bikes Gel Battery Spill-proof, Better vibration resistance Sensitive to overcharging Riders in rough terrains or city traffic For most modern motorcycles, maintenance-free or lithium-ion options offer the perfect balance between performance, safety, and longevity. Factors to Consider Before Buying a Bike Battery Getting the best battery for bike is a task. You need to go through several things as they can influence your decision. a. Battery Capacity (Ah) Measured in ampere-hours (Ah), this indicates how long a battery can supply power. A higher Ah rating means more backup. Example: A 7Ah battery will generally last longer than a 4Ah one. Check your bike’s manual for the recommended Ah capacity before upgrading. b. Compatibility Your new battery must match the specifications of your bike’s charging system. Always check: Voltage (typically 12V) Dimensions (to fit the battery compartment) Terminal type (for correct cable connections) A mismatched battery can cause frequent discharge or electrical faults. c. Brand and Warranty Go for trusted brands like Livfast, which are known for quality and durability. A longer warranty is often a good indicator of confidence in performance. Livfast bike batteries come with robust warranty coverage, ensuring reliability on every ride. d. Riding Style and Usage Daily Commuting: Opt for a long-lasting, maintenance-free battery. Occasional Riding: Choose a battery with low self-discharge, like a lithium-ion type. Adventure Touring: Go for vibration-resistant options such as gel or Li-ion batteries. e. Climate and Environment Hot or cold weather can affect battery health. If you live in extreme conditions, you prefer batteries with advanced heat resistance and sealed construction to avoid leaks or swelling. Comparing Popular Bike Battery Options Some of the most loved Livfast batteries that suit different types of bikes: Model Capacity Type Key Features Ideal For Livfast LFDBTZ4 (4Ah) 4 Ah Calcium-Calcium Quick charging, Extra backup Small bikes, scooters Livfast LFBTX7 (7Ah) 7 Ah Maintenance-Free Long-lasting power, Reliable cranking Mid-range bikes Livfast Duro Moto Battery Variable Maintenance-Free Durable, Zero maintenance, Quick charge Motorcycles and performance bikes These models are designed to deliver consistent performance, long life, and fast cranking — making Livfast a strong choice when you’re looking for the best battery for bike. Learn to Maximise Your Bike Battery Life Even the best battery for motorcycle won’t last long without care. Some bike battery maintenance pointers are here to keep it well: Start your bike regularly: Avoid leaving it idle for weeks. Keep terminals clean: Wipe off any corrosion or dirt. Avoid overusing accessories: Too many aftermarket lights or horns can drain your battery faster. Check for secure fitment: A loosely fitted battery can get damaged due to vibration. Park smartly: Keep your bike in a cool, dry place to prevent heat damage. Common Mistakes to Avoid When Buying a Bike Battery The typical catches are as follows: Ignoring manufacturer specifications Buying a battery that is low in cost and unbranded Forgetting to check the warranty period Overlooking size and terminal configuration Skipping installation by a professional Stay away from bigger issues in the future. Just spend some extra minutes on your research. Where to Buy the Best Bike Battery You can buy Livfast bike batteries both online and offline: Online: Available on trusted e-commerce sites. Offline: Visit your nearest Livfast dealer or service centre for expert guidance. Livfast batteries are known for reliability, fast cranking, and longer performance — making them one of the best battery for bike options in India. How to Pick the Perfect Bike Battery Here’s a quick summary to help you remember what matters most: Factor Ideal Choice Battery Type Maintenance-Free or Lithium-Ion Capacity As per the bike manufacturer’s recommendation Brand Trusted brand with warranty (like Livfast) Usage Daily ride – MF; Performance – Li-ion Maintenance Zero-maintenance for ease Environment Heat and vibration resistant If you are successful in choosing correctly, you will enjoy smooth starts and better mileage throughout. Conclusion So, now you know which type of battery is the ‘best battery for bike’. Go for the one that covers it all: Performance Longevity Convenience At Livfast, you get the confidence that your bike will deliver reliable starts and consistent power every day. All of it, irrespective of the road ahead. Related Blogs Replace Scooter Battery GuideTwo-Wheeler Battery Life TipsTypes of Automotive Batteries FAQ’s General When should I
Signs Your Car Battery Needs Immediate Replacement
Home Signs Your Car Battery Needs Immediate Replacement by Signs Your Car Battery Needs Immediate Replacement We know that you also want your car to behave actively all the time, like everyone else does. What if your car battery does not kickstart one day and ruins your mood as well as your plans? You have to figure out when the time is for your car battery replacement. If you are able to recognise the early signs of failure, it can save you: Time Money Inconvenience Read on to know those signs that will tell you that your car battery needs immediate replacement. Also, learn to extend your car battery life in the simplest ways. The Obvious Warning Signs Given below are the most common signs that say it out loud: Slow Engine Crank Your weak car battery will not let your engine start quickly. It will take longer to start. Plus, you will miss the roar, which is replaced by a sluggish cranking sound. Well, sometimes, cold weather is the reason behind this. But if this type of performance is frequent, you may need a car battery replacement soon. Dashboard Battery Warning Light Cars usually have some sort of warning lights that blink if your battery or charging system is not performing properly. Modern cars have a battery-shaped warning light that glows. If you ignore this light, be ready to face a complete battery breakdown one day. Visit a service centre to check whether it’s a charging issue or time for a car battery replacement. Frequent Need for Jump-Starts Jump-starts work, but if you feel the need to do it more often, it is not good. Jump-starting your car more than twice a month tells the story about your battery not holding a charge anymore. A healthy battery recharges when you drive. If that is not happening, then you need to replace it. Electrical Issues or Dim Lights Flickering headlights, fading dashboard lights, or slow power windows point to weak battery output. It indicates that the battery is dying. Swollen or Leaking Battery Case Battery swelling or acid leakage can happen because of: Overheating Overcharging Internal damage It is dangerous. In such cases, opt for car battery replacement immediately to prevent further damage. The Subtle but Serious Signs These are the symptoms that are not very obvious, but you need to notice them Unusual Odour You open the hood and smell a rotten egg. Do not worry, there is no rotten egg dropped in there. It is actually your failing battery that can leak sulfuric acid. This leakage of acid leads to: Damage Corrosion of other nearby components Parked Overnight Trouble You will have issues starting your battery in the morning if it can’t hold its charge through the night. So, when it remains idle for several hours, it tends to struggle in the morning. Yet, it works just fine later. Clicking Sound on Ignition Sometimes there is a typical noise that sounds like a click when you turn the key. This is mostly because the battery does not have the amount of charge that power the starter. A very familiar thing among the most common signs of a bad car battery. Loss of Power While Driving An alternator or battery failure can cause your moving vehicle to stall. You must not continue to drive in this condition. Why? Because it can impair your car’s electrical design. Sluggish Accessories Power windows, seat adjustments, or the infotainment system responding slowly? These are minute but foolproof hints that your battery power is dipping. How Long Does a Car Battery Last? Climate, driving habits, and maintenance play a great role in deciding your car battery life. People unknowingly reduce their car battery life when they: Leave their car in extreme temperatures Take frequent short trips Leave electronics on when the engine Three to five years is the battery’s life bracket in general. Therefore, consider car battery replacement if it is showing the above performance issue. What to Do If You Notice These Signs Car battery not working? What you can do here, is given below: Step Action Why It Helps 1. Go for a Battery Test Check the voltage with a voltmeter or at a service centre; it should be approximately 12.6V. Identifies weak or damaged cells early. 2. Clean Battery Terminals Use a baking soda solution to brush out the corrosion clean. Improves current flow and controls voltage drops. 3. Tighten Battery Connections Check that the terminals are in place and the clamps are tight. Stops unsecured connections from causing loss of power. 4. Inspect for Damage Check for cracks, leaks, or bulging. Prevents hazardous leaks and sudden failures. 5. Replace the Battery If more than 3 years old or showing major issues. Ensures uninterrupted vehicle performance. If multiple signs persist, don’t delay. A car battery replacement in time will save you from sudden breakdowns. Car Battery Maintenance Tips Maintaining your battery well can extend its life and prevent premature failures. Follow these easy car battery maintenance tips: Clean the terminals regularly to remove dirt and corrosion Keep tight connections to avoid intermittent failures. Check the electrolyte level (for lead-acid types) Top up with distilled water when needed Drive regularly Turn off all lights and accessories when the engine is off. Park in shaded or covered areas. Test your battery twice a year to spot issues early. These steps will definitely extend the life of an inverter battery (if used for backup systems) and also improve the overall car battery life. When to Change Car Battery Be sure of the time. You need to know exactly when to change your car battery. Some points to remember here are: The car battery is over 3 years old Requires jump-starts Shows any of the warning signs listed above Smooth performance and better fuel efficiency are what you will get in return. And if you are aiming for added safety, go for a high-performance option from Livfast. The batteries are built with advanced technology

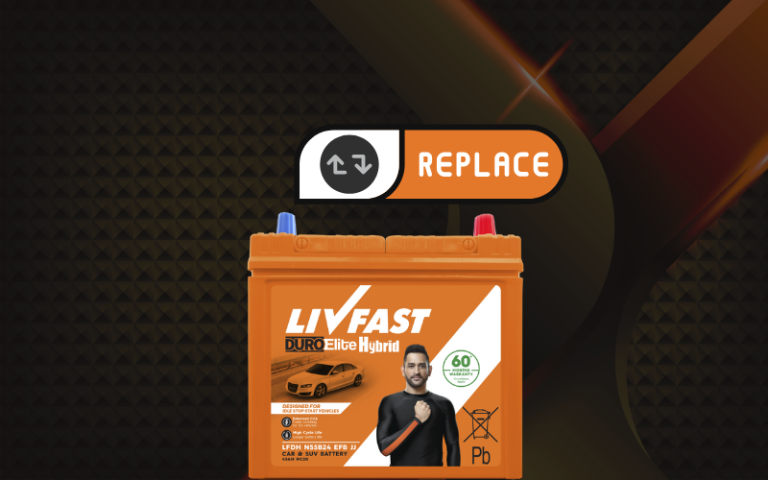
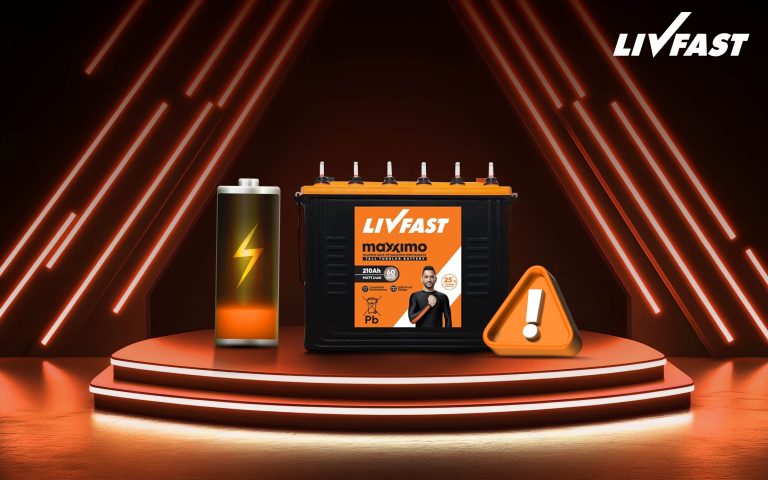
How to Know When to Replace Your Inverter Battery
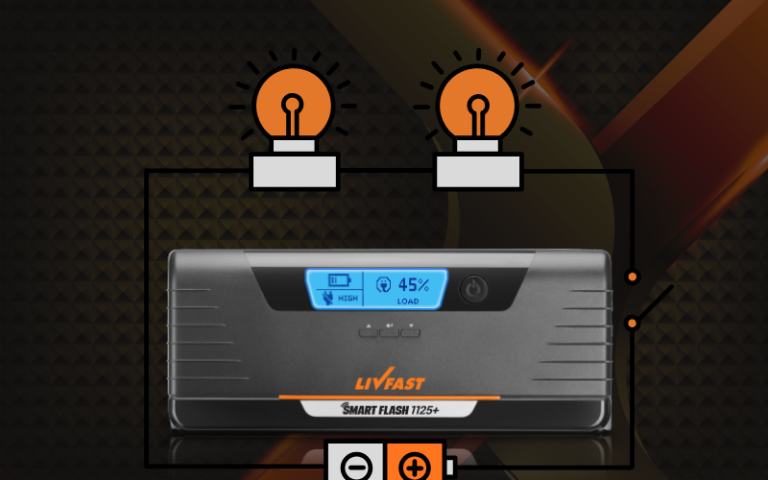
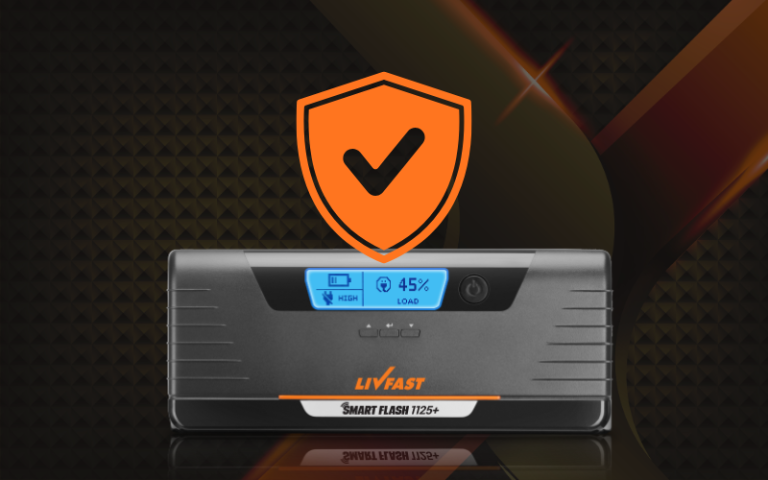
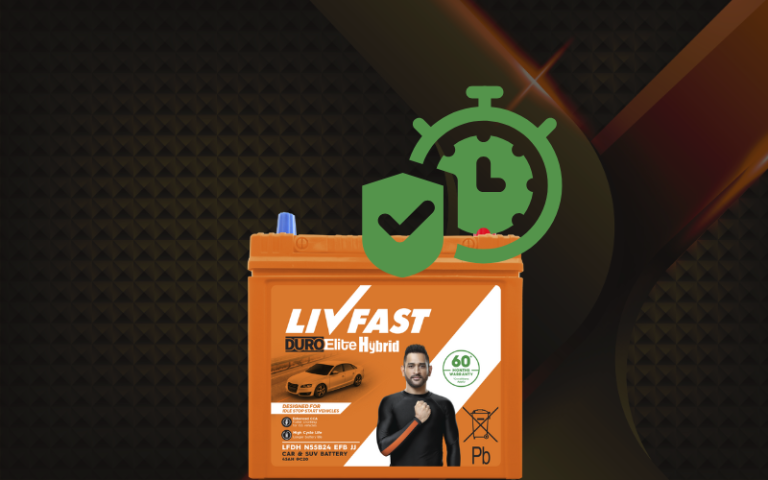
Home How to Know When to Replace Your Inverter Battery by How to Know When to Replace Your Inverter Battery Inverter batteries are your only go-to options when the power goes out. And you know that power cuts can strike anytime. In such situations, your inverter batteries keep your home running smoothly. So, you need to keep a good check on your inverter battery, its health, and durability. How will you know it is time to replace your inverter battery? It is simple, as there are some signs that you will have to explore. Read on to know them as well as why they show up. You will also get tips on what you can do to extend the life of your inverter battery for reliable backup year after year. Know More About the Life of an Inverter Battery Before jumping into replacement signs, it’s important to understand what determines inverter battery life. On average: Battery Type Average Life Span Remarks Flat Plate Battery 2–4 years Best for short & frequent power cuts Tubular Battery 4–7 years Lasting, perfect for heavy use Lithium-ion Battery 7–10 years Efficient and maintenance-free 1. Reduced Backup Time The most common sign that it’s time to replace your inverter battery is reduced backup duration. There is a warning sign if your inverter used to power your house for five to six hours but now only lasts two to three. It commonly indicates that the battery’s capacity to retain a charge is declining. What’s happening? Over time, chemical reactions inside the battery weaken. This limits its charge capacity and energy output, resulting in shorter backup hours. Tip: Monitor your inverter’s average backup time once a month. A consistent decline means you should consider inverter battery replacement soon. 2. Extended Charging Time An unmistakable sign of ageing is when your battery takes a prolonged recharge timespan than usual. The internal plates may have sulfated or degraded, given that charging used to take six hours but now takes ten. The battery’s capability to absorb and store energy is affected by this. So, you can: Check that your inverter’s charging mode is appropriate for the battery type. If charging remains unusually slow, it is time to replace the inverter battery rather than forcing it to perform beyond its limits. 3. Physical Damage or Leakage Always check the physical condition of your battery. Visible signs like leakage, corrosion on terminals, or bulging sides should not be ignored. Why this happens? Overcharging Poor ventilation Internal chemical imbalance Such damage not only shortens inverter battery life but also poses safety risks like acid spills or short circuits. If you notice these issues, replace inverter battery immediately rather than attempting repairs. 4. Reduced Performance of Appliances Does your inverter struggle to power basic devices? Do your fans run slower or lights flicker during backup? This indicates the battery can no longer deliver consistent current. When the life of an inverter battery decreases, voltage fluctuations happen. Even if your inverter seems fine, a faulty battery will cause performance drops. You can connect a small load (like one fan and a light) and see if the voltage stays stable. If it does not, then it is time for inverter battery replacement. 5. Ageing Battery You must not ignore your battery’s lifespan because it can lead to sudden power failures. Flat plate batteries: 2–4 years Tubular batteries: 4–7 years Lithium-ion batteries: 7–10 years If your battery is nearing or has crossed its expected lifespan, even minor issues are signs to replace inverter battery. Don’t wait for a complete breakdown. 6. Frequent Maintenance or Repairs If you find yourself topping up water too often, cleaning terminals regularly, or calling for service repeatedly, it’s a hint that your battery is wearing out. Spending money on constant upkeep can cost more than buying a new unit. A fresh battery ensures reliability and minimises downtime. Good maintenance helps to increase inverter battery life, but when issues become frequent, you must go for a replacement. 7. Overheating During Charging Excessive heat is not normal. Slight warmth is ok. If your battery feels hot more than usual while charging, it means: Internal short circuits Chemical deterioration might be the cause Overheating of the battery can damage the battery and even your inverter. Ensure the battery is kept in a well-ventilated space. If heating continues, replace inverter battery immediately to prevent risks. How to Check Your Battery’s Health Do you need to have technician skills to check your battery? The simple steps can help anyone check their battery: Visual Inspection: Look for corrosion, leaks, or swelling. Backup Test: Measure how long the inverter runs under a known load. Voltage Check: Use a multimeter to measure battery voltage after full charge (should be 12.4–12.7V for a 12V battery). Charging Time: Track how long it takes to charge fully — a sharp increase signals ageing. If two or more of these tests show irregular results, it’s time to replace inverter battery. Why Timely Replacement Matters Replacing your inverter battery on time ensures: Uninterrupted Power Supply: No surprises during outages. Appliance Safety: Weak batteries can damage connected devices. Inverter Protection: Old batteries can strain or damage your inverter. Cost Efficiency: Prevents higher repair costs and improves energy efficiency. Delaying inverter battery replacement might seem economical short term, but it leads to higher expenses and safety concerns in the long run. Extend the Life of Your New Inverter Battery After you replace inverter battery, follow these practices to maximise its lifespan: Keep It Cool: Store in a ventilated area, away from heat and moisture. Regular Maintenance: Clean terminals and top up distilled water (for lead-acid types). Avoid Overload: Don’t connect more appliances than the inverter can handle. Use Regularly: Idle batteries degrade faster; periodic usage keeps them healthy. Check Voltage Levels: Maintain proper charging voltage to prevent overcharging. A few simple habits can add years to the life of battery of the inverter for consistent performance. Choose the Right Replacement — Choose Livfast When it’s time
Best Practices for Safe Inverter Installation at Home
Home Best Practices for Safe Inverter Installation at Home by Best Practices for Safe Inverter Installation at Home When power cuts become a norm, the humble inverter swoops into your mind as the only saviour. It is your reliable partner, always ready to rescue your peace (and your Wi-Fi). But what happens when your saviour trips on its own cables? Yes, when an inverter installation at home goes wrong, your “Ohh, lights are back!” moments turn into “Wait… why’s the slowing down?” A properly installed inverter keeps your home glowing and also serves the purpose of guarding it from electrical mishaps. So, before you play the electrician-for-a-day, let us go over the best practices of home inverter installation. The Importance of Proper Inverter Installation To know why it is important, it is a must to understand that improper inverter installation at home can lead to a lot of trouble. Overheating, voltage fluctuations, or even electrical fires are a few to name. A well-installed inverter, on the other hand: Ensures safety for your family and appliances Improves inverter performance and efficiency Extends the lifespan of your inverter and batteries Reduces maintenance costs Minimises power loss Step-by-Step Best Practices for Inverter Installation at Home The process of installing is simple but needs a mindful approach. Here we have explained it all: 1. Read the Manual Thoroughly Before anything else, read the manufacturer’s manual. It provides model-specific guidance about: Mounting requirements Cable sizes and voltage compatibility Battery and load limits Skipping this step is one of the most common mistakes during inverter installation. 2. Choose the Right Location The installation area plays a huge role in inverter performance and safety. Dos Don’ts Select a cool, dry, and well-ventilated area Avoid damp or humid spaces Keep the inverter away from direct sunlight Don’t install near stoves or heat sources Ensure at least 6–8 inches clearance around for airflow Avoid cramped or closed cabinets Install at a comfortable height for easy monitoring Do not install in children’s play zones Good ventilation prevents overheating, one of the top causes of reduced inverter efficiency during home inverter installation. 3. Mount Securely on a Stable Surface With proper mounting, you can be sure of safety and smooth operation. Mount the inverter vertically on a solid, vibration-free surface. Use heavy-duty screws and wall plugs. Avoid placing the inverter on uneven or metal surfaces. Unsure how to install an inverter at home securely? Consult a qualified technician for proper wall mounting. 4. Use the Correct Wiring and Cables It goes without saying that the right wiring during inverter installation at home is far more important than you can think. Use cables recommended by the manufacturer. They are usually copper with the correct gauge (thickness). Make sure all connections are tight and polarity-correct (positive to positive, negative to negative). Avoid extension cords for heavy appliances. Plug the inverter directly into a wall socket. 5. Ground the System Properly Grounding (earthing) is yet another critical safety measure in inverter installation. It prevents shocks and electrical surges. Steps for proper grounding: Use a copper grounding rod buried in the ground. Connect it to the inverter’s grounding terminal using a thick copper wire. Make sure all electrical components share a common ground point. Grounding not only protects users but also ensures stable inverter performance over time. 6. Follow Electrical Safety Measures Additionally, some more home inverter installation essential safety tips are: Turn off the main power supply before connecting wires. Use insulated gloves and safety glasses. Keep water, metal tools, and flammable materials away from the work area. Use a multimeter to check that there is no live current before touching wires. Specific Tips for Different Types of Inverters Different inverter types come with their own safety and setup requirements. Understanding the basics helps you ensure safe operation. Type of Inverter Key Installation Tips Pure Sine Wave Inverter Ideal for sensitive appliances. Match inverter capacity with your home’s power load. Modified Sine Wave Inverter Suitable for basic devices. Avoid using for motor-based or high-end electronics. Solar Inverter Must be installed by certified professionals. Follow proper wiring between solar panels and grid. Square Wave Inverter Use only for basic applications. Generally not recommended for modern home setups. Common Mistakes to Avoid During Inverter Installation Even small errors during home inverter installation can lead to big problems later. Avoid these pitfalls: Installing the inverter in a poorly ventilated area Using undersized wires or mixing different gauges Neglecting grounding connections Placing the inverter too close to batteries (especially lead-acid ones) Ignoring battery maintenance post-installation A safe setup is one that balances convenience, safety, and long-term reliability. Livfast: Powering Safe and Smart Homes At Livfast, safety and innovation go hand in hand. Livfast inverters are engineered for durability and performance. They are just perfect for your inverter installation at home. Livfast Inverter Range Highlights Type Features Best For Home Inverters Pure Sine Wave technology, 25% faster charging, longer backup Everyday household use High-Capacity Inverters Handles 2000VA–5000VA loads, ideal for large homes/offices Heavy power demands Solar Inverters Sustainable, energy-efficient, supports grid connection Eco-friendly homes Smart Inverters Wi-Fi connectivity, app-based monitoring Modern connected homes All Livfast inverters are equipped with overcharge protection, fault indication, and high safety standards to ensure worry-free usage. Why Choose Livfast for Your Home Inverter Installation? Reliable Performance: Consistent, stable power for all appliances Advanced Technology: Pure Sine Wave design ensures smooth operation Fast Charging and Long Backup: Up to 25% faster charging than competitors Safety First: Built-in protection against overload, short circuits, and overheating Conclusion So, now you know that your inverter installation at home needs awareness and proper care. Every step matters here. You select the right spot and use proper wiring for regular maintenance. So, no more searches of ‘how to install inverter at home’, A qualified professional is the best person to do this job and Livfast– your go-to reliable brand. Our inverters are built for safety, durability, and superior performance. Choose Livfast for a safer, smarter, and
How to Make Your Car Battery Last Longer
Home How to Make Your Car Battery Last Longer by Every car owner dreads the moment when they turn the key and do not hear their car’s roar. A weak click is all that comes out of the engine. Why even does that happen? Such weak sounds are a clear signal that your car battery life is at stake! A dead car battery can spoil your plans. But the best part: It is possible to extend your car battery life and dodge those unexpected breakdowns. Let us help you understand: What affects the life of car battery? How to maintain it? How can Livfast batteries keep your car running longer and stronger? Read on to know it all! Car Battery Life The car battery is the main component of your vehicle’s electrical system. The car battery powers everything up. Ignition Lights Infotainment system Air conditioning However, with time, the car battery will also wear out. So, you may question: ‘How long does a car battery last?’ Usage, maintenance, and driving conditions are responsible factors that determine the battery’s life. Yet, on average, most car batteries last between 3 to 5 years. The things that can shorten the battery life of car are: Extreme temperatures Frequent short trips Maintenance neglect Factors That Affect Car Battery Lifespan Your car battery does not just fail overnight. Its performance depends on several factors that can influence how long it lasts. Factor Impact on Car Battery Life Tips to Improve It Driving Habits Short, frequent trips prevent full charging. Take longer drives occasionally. Weather Conditions Heat accelerates corrosion; cold slows reactions. Park in shaded areas during summer. Battery Maintenance Dirt and corrosion reduce efficiency. Keep terminals clean and tight. Electrical Load Overuse of accessories drains power. Turn off lights and devices when parked. Charging System Health Faulty alternator can over/undercharge. Get periodic professional checks. But remember that small steps can bring about a big difference. Simple Ways to Extend the Life of Your Car Battery You do not need an expert mechanic to take care of your car battery. Follow these simple habits to extend your car battery life. 1. Keep It Clean When the terminals get corroded, they can cause poor connectivity and lower efficiency. Use a toothbrush dipped in baking soda and water to clean terminals. Always wear gloves and safety glasses while cleaning. 2. Check Battery Health Regularly You can use a simple car battery tester to test your battery after a few months. This testing will help you identify weakening performance before it fails. 3. Avoid Short, Frequent Trips Your battery needs enough time to recharge after starting the car. Combine short errands into one longer trip. Occasionally take your car for a 20–30-minute drive to recharge fully. 4. Secure the Battery Firmly A loose battery can vibrate, damaging internal components. Tightly fasten it within its bracket. 5. Turn Off Unnecessary Electronics Your car’s headlights, cabin lights, and infotainment systems must be off before you go. This prevents unwanted power drain. 6. Disconnect Idle Accessories Remove any unused plug-in devices or chargers that may draw power even when the car is off. Maintenance Tips for Different Battery Types Care routines and styles are different for different battery types. Let us look at how you can maximise the car battery life for different types. Battery Type Best Practices Lead Acid Battery Check water levels regularly (top up with distilled water). Avoid overcharging; ensure alternator and voltage regulator work properly. VRLA (AGM & Gel) Battery Protect from extreme temperatures. Use a battery maintainer if the vehicle isn’t used frequently. Lithium-Ion Battery Avoid deep discharges; keep charge between 20–80%. Limit fast charging to extend battery life. Common Mistakes That Reduce Car Battery Life Many car owners unknowingly do things that cut short their car battery lifespan. Watch out for these common errors: Ignoring corrosion or dirt buildup on terminals Leaving the car unused for long periods without charging Using high-power accessories without the engine running Failing to replace old or faulty wiring Overlooking early warning signs like dim lights or slow engine cranking By avoiding these, you will add months or even years to your battery’s performance. How Livfast Batteries Are Designed for Longer Life Longevity and consistent performance are the results of the advanced technology used in the Livfast batteries. Battery Type Key Features Best For Lead Acid Batteries Reliable, affordable, and easy to maintain Everyday vehicles Tubular Lead Acid Batteries Enhanced performance and longer service life Heavy-use cars and SUVs AGM (VRLA) Maintenance-free, fast cranking, spill-proof Modern vehicles with high power needs GEL (VRLA) Long-lasting, vibration-resistant Off-road and extreme weather conditions Lithium-Ion Batteries Lightweight, high energy density, long life Premium and electric vehicles Livfast’s Duro Edge, Duro Super, Duro Elite, and Duro Truc Series are tailored to different driving styles and vehicle requirements (compact cars to commercial vehicles). Each Livfast battery undergoes rigorous quality testing and is built to provide better car battery life: Zero maintenance Faster cranking All-weather performance Pro Tips to Keep Your Battery Going Strong Action Why It Helps Regular Servicing A healthy engine and charging system improve battery efficiency. Drive Regularly Keeps the alternator active and battery charged. Monitor Battery Voltage Detects early issues and prevents failure. Use Genuine Batteries Ensures longer battery life and better compatibility. Summing Up So, now you know the tricks and maintenance tips to maintain your car battery life. It is not complicated at all. You just need to follow the right habits. Do: Regular checks Proper maintenance Use a high-quality battery So, all those car drivers (daily or occasional) must know how to take care of their battery. This will help save them from unexpected troubles. Related Blogs Fixing a Dead Car BatteryBest Car or SUV BatteryCar Battery Replacement SignsTypes of Automotive Batteries
Difference Between a Regular Inverter and a High-Capacity Inverter
Home Difference Between a Regular Inverter and a High-Capacity Inverter by Difference Between a Regular Inverter and a High-Capacity Inverter Power cuts are an enemy that can disrupt your work, essential household tasks, comfort, and overall daily life. Here, an inverter can be your go-to saviour. The irony? Every inverter is different. Two common types: Regular inverters and high-capacity inverters! They both deliver power to keep the appliances running during outages; however, they are far apart in terms of performance, features, and suitability. Wondering which type will best cater to your requirements? This blog lists the primary differences between regular inverters and high-capacity inverters to give you a clear picture. So, scroll down, read the information, and make informed decisions. The Two Types of Inverters Regular Inverter A preferred power backup choice for most homes, a regular inverter can effortlessly handle low to moderate power needs. It is primarily crafted to run the fans, lights, and one or two basic appliances to leverage comfort during power cuts. With an affordable price, it delivers moderate load capacity, average battery backup, and easy installation for smaller spaces. High-Capacity Inverter Need a unit to bring more energy? The high-capacity inverter is ideal for big houses, offices, or commercial buildings. This one is designed to allow refrigerators, air conditioners, washing machines, and desktops to provide powerful performance during interrupted power. Large battery efficiency, robust power output, and long-lasting backup, it proves to be a reliable and durable choice. Regular Inverter vs High-Capacity Inverter: Key Differences Before making a purchase, here are the differences between the two types to help you save money and time: Power Capacity Regular Inverter: This one comes with a limited capacity and is made to handle the essentials of the house, such as lights, fans, WiFi routers, or a small TV. It offers moderate energy to allow the user to keep the household running without any hassle.High-Capacity Inverter: This one is crafted to make refrigerators, washing machines, geysers, desktop computers, and air conditioners run during outages. It boasts a large load capacity to make it a must-have power backup solution for bigger residential and commercial spaces. Battery Size and Backup Regular Inverter: Known to deliver shorter backup duration, regular inverters are equipped with small or medium capacity batteries. They are best for areas where shorter power cuts are frequent.High-Capacity Inverter: A go-to solution for extended power backup, it is designed with large batteries to last for several hours. Another highlight? It can also support multiple batteries to run the heavy-duty appliances during long power cuts. Usage Purpose Regular Inverter: Living in a small apartment or house where power cuts are uncommon? Go for a regular inverter. The best choice to keep the basic essentials running at home is to ensure daily everyday life is not disturbed.High-Capacity Inverter: A suitable option for commercial spaces, offices, and larger houses, a high-capacity inverter maintains the operations. Businesses cannot afford downtime, and bigger households do not run without appliances; they deliver high energy for higher consumption. Cost Regular Inverter: For small families, couples, and bachelors, a regular inverter proves to be budget-friendly and affordable. The compact design and essential features make this investor a value for money solution to cater to small household requirements.High-Capacity Inverter: If your pocket allows you to make a higher investment to run a bigger household or commercial setup, a high-capacity inverter is perfect.A high capacity inverter features a high-capacity battery, advanced technology, and robust load handling to make multiple appliances run at the same time. It may be expensive, but it is known as a cost-effective purchase. Installation and Maintenance Regular Inverter: A simple and easy process, a regular inverter can be installed without calling any professionals. The key is to install it in a ventilated space. Thinking maintenance? It is low-cost and straightforward, requiring quarterly checks on the battery and its water level.High-Capacity Inverter: This one comes with advanced configuration and a larger battery, demanding assistance from a professional. As it is a complex power backup solution, the professional will ensure the placement and wiring are proper and safe. Here, the maintenance is also high to confirm long-term use. Space Requirement Regular Inverter: Compact in size, regular inverters can easily fit into small houses. Corner of the room, beside the wardrobe, or under the table – yes, it can be accommodated anywhere without impacting the aesthetics of the space. Plus, it can be moved from one place to another effortlessly.High-Capacity Inverter: Bulky and heavy, high-capacity inverters demand a dedicated area. Its large batteries and supporting equipments require you to place it in a utility area or garage. Also, advanced planning is a must to install this inverter for efficient performance. Performance During Long Power Cuts Regular Inverter: Short power cuts? A regular inverter is ideal; however, it can only support for 3 to 5 hours. After a few hours, it requires a recharge to deliver energy. This is a suitable option for areas where the power supply is stable with minimal outages.High-Capacity Inverter: This inverter is a true companion in all situations. From running an air conditioner for several hours to operating a computer for a day, it is a reliable solution to keep the operations functioning during long power outages. Pros and Cons: Inverter Comparison Guide Type Pros Cons Regular Inverter Affordable Limited Load Capacity Compact No High-Power Devices Easy to Install Cannot Support Large Households Ideal for Small Spaces Run Basic Appliances High-Capacity Inverter Long Back Hours Expensive Heavy-Duty Appliances Large Installation Space Reliable Performance High Maintenance Ideal for Bigger Households Not Ideal for Budget-Conscious Users Support Long Outages Conclusion In overall regards, a regular inverter and a high-capacity inverter satisfy the same purpose. The difference lies in performance, cost, power, and convenience. The key to choosing the right inverter is to analyse your lifestyle, space, usage, and comfort. The suggestion? Opt for Livfast inverters to embrace Sine Wave Technology with 25% extra backup and 25 faster charging for protecting
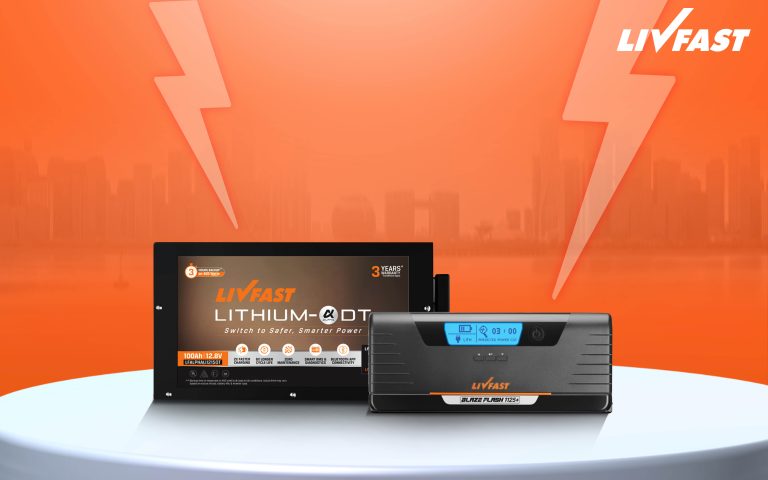
What is a Lithium-Ion Inverter Battery?
Home What is a Lithium-Ion Inverter Battery? by What is a Lithium-Ion Inverter Battery? If you have experienced sudden power cuts, you know what’s next. The lights blink out, the fan stalls, and for a moment, you think, now what? That is when an inverter comes to your rescue. But here’s the catch: not all inverter batteries are the same. And if you’ve been hearing about the lithium ion inverter battery, there’s a reason. It’s not just another power backup solution; it’s changing how homes and offices stay running when the grid goes quiet. Let us know more about the lithium-ion battery for inverters in detail here. Understanding Lithium Ion Inverter Battery An inverter battery has one simple job: store electricity and release it when there’s an outage. Traditional lead-acid models use lead plates and liquid electrolytes to get this done. A lithium-ion inverter battery works differently. Inside it are lithium-ion cells that move ions back and forth between electrodes when charging and discharging. This chemistry makes the battery lighter, faster to charge, and far more efficient. The same principle powers smartphones, laptops, and even electric vehicles — so it’s proven technology, now scaled up for home use. These aren’t bulky old-school batteries filled with liquid acid. Instead, a lithium ion inverter battery is lighter, smarter, faster, and longer-running compared to the lead-acid types you may already know. Why Don’t We All Use Lithium-Ion Already? It’s a fair question. If these batteries are so great, why has your neighborhood probably been running on lead-acid for years? Two reasons: cost and habit. Lead-acid batteries are affordable, easy to make, and we have been using them forever. But they come with headaches: constant topping up (yes, you have to add water), limited lifespan, and a tendency to take up a lot of space. On the other hand, lithium-ion is slightly premium with more upfront investment. But what you save is in terms of maintenance, energy efficiency, and longevity. Think of it like buying more fuel-efficient cars; it costs more upfront, yet you reap the benefits over time. Lead Acid Vs. Lithium Ion Inverter Battery Let us understand the difference between the two of them: Longer life: A standard lithium ion inverter battery can last anywhere between 7–10 years. Compare that to a lead-acid battery that may give you 3–5 years if you’re lucky. No maintenance hassle: Forget filling water or worrying about corrosion. Once it’s installed, you can pretty much leave it alone. Compact size: Imagine the battery that runs your phone. Lithium batteries for home use are much more compact and lighter, which means they slot into your home without eating up half your storage space. That is not the case with lead-acid batteries. Fast charging: Ever been caught in a long power outage, only to have your inverter struggling with backup because the battery didn’t get enough charging time earlier? The lithium battery charges very fast, so small supplies of electricity from the grid are also sufficient to recharge them. Consistent power: With a rechargeable lithium battery, voltage drop isn’t an issue. Your fans spin at regular speeds, lights don’t flicker, and electronics get stable current. Lithium Battery for Home Use: Is It Worth It? Let’s picture a scenario. Your home has frequent power cuts, say, 3–4 hours a week. With a lead-acid battery, after about 3–4 years, you’d be making another battery purchase or spending good money on repairs. Over 10 years, you might go through two or three replacements. With a lithium battery for home use, you’re likely to use the same battery through that entire period. No replacements. No endless maintenance calls. Add in the energy efficiency, and yes, it’s worth the upfront cost for many families. For people who work from home or households where kids are glued to online classes, this isn’t about convenience anymore. It’s peace of mind. Think Beyond Homes It’s not just homes that benefit here. Small offices and shops are increasingly leaning on lithium-ion inverter batteries. Take a tailor’s shop, for instance, with sewing machines running every day. A sudden power cut means downtime, which is lost income. A reliable, fast-charging backup makes sure the machines don’t sit idle. Restaurants, clinics, and even tuition centres: places where power disruption directly affects customers, are making the switch too. Choosing the Right Lithium-ion Inverter Battery Before purchasing, consider these major points: Capacity: Match it with the appliances you need to run. A high capacity supports more load. Compatibility: Not every inverter is designed for lithium batteries. Confirm before replacing or purchasing. Brands and warranties: Established brands like Livfast provide warranties and better after-sales support. This homework ensures that your investment performs well for years. The Quiet Revolution: Sustainability There’s also a quieter but important angle: the environmental impact. The lead-acid battery contains toxic lead and sulfuric acid. If they are not recycled properly, they can contribute to pollution. The lithium-ion is cleaner by design, and once out has a high recycling value. So if you are thinking of the long term, convenience, and for the planet, there is a very strong case for lithium. Wrapping Up Families today want convenience. Nobody has the time to refill distilled water every month or worry about leaks. That’s why a lithium battery for home use makes sense. It takes up less space. It’s lightweight compared to a lead-acid battery of similar capacity. It’s clean and there’s no risk of acid spills. Once installed, it works quietly in the background without any need for upkeep. If you are exploring options of inverters and batteries for your home, then Livfast brings a range of options for your homes, offices, and shops. Explore the collection or reach out to your nearest dealer to know more. Related Blogs Inverter Battery Health CheckInverter Battery Life ExplainedReplace Inverter Battery GuideCommon Inverter Mistakes FAQ’s General How long does a lithium-ion inverter battery last? Generally, they last for 7–10 years, depending on usage patterns, load, maintenance, and brand quality. Is this Helpful? Can
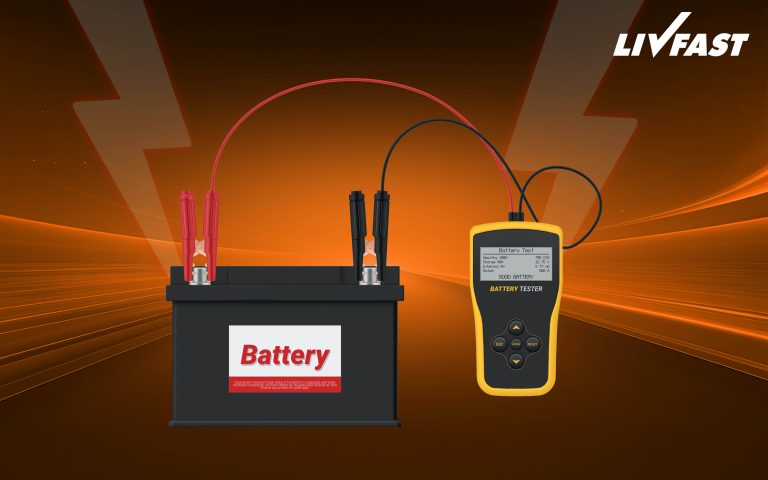
How to Check Inverter Battery Health?
Home How to Check Inverter Battery Health? by How to Check Inverter Battery Health? When the power goes off, most of us expect our inverter to take over and offer an uninterrupted power supply. But here is the truth: no matter how advanced your inverter is, if the battery is not healthy, you will not get the backup you need. That is why it is so important to know how to check the health of an inverter battery. At Livfast, we believe in making energy simple, reliable, and stress-free. And a part of that promise is helping you understand how to take care of your battery so that it gives you years of reliable performance. In this blog, we’ll walk you through an inverter battery health check, the signs to look out for, and a few practical inverter battery maintenance tips. Why Battery Health Matters? A regular inverter battery health check ensures: You get consistent backup during outages. Your appliances run safely without voltage dips. The battery lasts for a long time, making you save on replacement costs. You find small issues before they become large and costly. In short, it is not a task to check inverter battery health. Instead, it gives you peace of mind. How to Check Inverter Battery Health? You don’t have to be a technician to know whether your battery is doing well. Here’s a simple inverter battery testing guide you can follow at home: 1. Look for Physical Signs Check the battery casing for signs of cracks, leaks, or bulges. A healthy battery should look clean and intact. If you notice swelling or acid leakage, it is time to take action. 2. Monitor Backup Duration One of the easiest ways to check inverter battery health is to notice how long it lasts during a power cut. If the backup has reduced significantly compared to before, it may be losing capacity. 3. Check the Charging Time A healthy battery charges within the expected time. If it’s taking much longer or discharging unusually fast, it’s a sign the health is declining. 4. Inspect the Terminals A corroded or loose terminal can affect performance. Keep them clean, dry, and tightly connected to ensure smooth charging and discharging. 5. Track Water Levels (for Tubular Batteries) If you are using tubular batteries, check the electrolyte levels once every two months. Always top up with distilled water and not tap water to avoid chemical damage. 6. Battery Voltage Check Another method of how to check inverter battery health is through a quick voltage check. For 12V batteries, a healthy reading is usually between 12.6 to 12.8 volts. If the reading is low, it indicates that the battery is weak and losing its charge-holding capacity. To check inverter battery health, you can follow these tips and schedule maintenance if required. Inverter Battery Maintenance Tips Once you’ve learned how to check inverter battery health, the next step is keeping it that way. Here are some tips we share with all Livfast users: Keep the battery in a ventilated place to prevent overheating. Avoid deep discharge and recharge before it drains completely. Clean the terminals regularly to prevent rust or loose connections. Use appliances wisely during backup and don’t overload the battery. If you notice a drop in performance, then schedule maintenance from time to time. How Livfast Batteries Make Health Checks Easier? We know battery maintenance can feel like extra work. That’s why we’ve built Livfast inverter batteries with features that naturally support long life and easier upkeep. 25% Extra Backup – Our unique active material blend ensures your battery runs longer between charges, so reduced backup is less of a worry. High-Performance Output – Robust design provides smooth, consistent power, keeping equipment safe during the outage. Deep Cycle Efficiency – Designed to handle deeper discharge without losing capacity, leading to less frequent performance checks. Low Maintenance Design – Sustain all weather conditions with minimal wear and tear. When you pair good habits with Livfast’s technology, checking inverter battery health is less about worries and more about confidence. Everyday Scenarios Where Battery Health Matters It is easy to forget about the battery until power cuts. But think about these situations: Work from home: Your Wi-Fi router and laptop count on uninterrupted backup. Summer nights: If the battery is not healthy, fans and cooling systems stop running midway. Family comfort: Lights, appliances, even a TV for the kids—all rely on a battery that performs. Critical needs: If there’s medical equipment in the home, battery life becomes a safety issue. In each case, a simple health check ahead of time will prevent you from suffering unexpected blackouts when you need power the most. Final Thoughts Checking your inverter battery health isn’t complicated. Look at physical signs, monitor backup time, track charging, voltage, and keep the terminals clean. Pair these with basic inverter battery maintenance tips, and your battery will reward you with years of dependable service. At Livfast, we’ve designed batteries that make this process easier, giving you extra backup, high performance, deep cycle efficiency, and low-maintenance convenience. With us, you not only get power but also confidence that your backup system is always ready. Remember routine inverter battery health check ensures that your system works and supplies power as expected. With the best Livfast battery paired with an advanced Livfast inverter, you get peace of mind even during long power outages. Related Blogs How to Charge Inverter BatteryReplace Inverter Battery GuideInverter Battery Life Explained FAQ’s General How do I know if my inverter battery is healthy? Check the backup time, charging speed, and physical condition. A battery that holds a charge well and looks intact is generally healthy. Is this Helpful? Does my inverter battery need regular testing? Yes. It’s best to perform a basic inverter battery health check every few months to detect issues early and keep your system reliable. Is this Helpful? What are the best inverter battery maintenance tips? Keep the battery ventilated, avoid complete discharge, clean the terminals,
How to Charge an Inverter Battery?
Home How to Charge an Inverter Battery? by How to Charge an Inverter Battery? Power cuts can last for a few minutes or, worse, stretch for hours. Either way, the only thing standing between you and total blackout is your inverter battery. While most of us don’t think about it, how you charge your inverter battery decides how long it will last, the backup it will give, and its reliability over the year. Hence, knowing about inverter battery charging is not about tech know-how. It is about keeping your home running at that time when you most need it. Let us understand how to charge an inverter battery properly. Why Charging the Right Way Matters? Think of an inverter battery like a water tank. If you only fill it halfway, you’ll run out of supply before you expect. If you overflow it, you risk leaks and waste. Charging works in the same way, too little, too much, or careless habits can shorten its lifespan. A properly charged battery ensures: Enough backup to run essentials during an outage Better efficiency (so you get the most out of each cycle) Longer life, saving you the cost of frequent replacementsIn other words, the charging process isn’t just background work. It’s the lifeline of your power backup system. How the Inverter Battery Charging Process Works? Most modern inverters handle charging automatically. Still, it may be helpful to understand what happens: Input from the main grid – If power is available, the inverter then switches to charge mode. Bulk charging – The battery gets charged quickly up to around 80%. Absorption stage – Charging slows down, giving the plates time to soak up power evenly. Float stage – Once full, the inverter trickles just enough current to keep the battery topped up.This step-by-step inverter battery charging process protects the battery from being overworked. Best Way to Charge an Inverter Battery If you want your battery to last years instead of months, the key is simple: good habits. Here are some inverter battery charging tips that are practical and easy to follow. 1. Give it Time Avoid rushing the cycle. Let the battery charge fully before heavy use. Cutting it short repeatedly reduces backup time in the long run. 2. Don’t Overload The System It can be tempting to run every appliance when charging, but that puts unnecessary strain on the inverter. Keep the load light while it’s replenishing. 3. Keep it Cool and Ventilated Batteries generate heat during charging. A corner with airflow prevents overheating and helps the charging process stay efficient. 4. Watch The Water Levels If you’re using tubular batteries, check water levels once in a while. Always use distilled water and not tap water since minerals can damage the plates. 5. Keep The Terminals Clean Dust, rust, and disconnected wires can interrupt the charging process. Give it a swift swipe with a dry cloth once a month to ensure the terminals are clean. These aren’t big changes. But together, they can add years to the life of your inverter battery charging process. Mistakes People Often Make Even the best batteries can’t survive poor habits. Watch out for these mistakes: Using tap water instead of distilled water – It shortens life drastically. Letting the battery discharge completely – Full discharges stress the plates. Recharge before it’s fully drained. Placing the battery in damp corners – Moisture causes corrosion and leakage. Ignoring abnormal noises or smells – A smell, noise, or excessive heat during charging is not “normal.” Get it checked. How Livfast Inverter Batteries Make Life Easier? Here’s where Livfast takes the stress out of battery care. With our inverter battery, you do not have to worry about whether you are charging correctly or not. Each battery is made with features that support safe, efficient, and long-lasting performance. 25% extra backup: Thanks to a unique mix of active materials and active carbon, our battery promises up to 25% more backup, so your home lasts for a long time during an outage. High-performance output: Robust technology ensures stable power delivery, which helps your equipment run smoothly even during long power cuts. Deep cycle efficiency: Designed to handle deep discharge without losing performance, this adds both longevity and better value over time. Low maintenance design: Minimum maintenance with maximum durability, the Livfast inverter batteries are designed to face all types of weather, while delivering you consistent resultsAlong with these features, practising good charging habits makes your batteries last longer while ensuring an uninterrupted power supply during outages. Everyday Scenarios Where Charging Habits Matter Let us understand how good charging habits can help with power outages across different situations: Work from home: Your Wi-Fi and laptop depend on steady backup. If your battery isn’t charged fully, you risk losing connection mid-meeting. Hot summer nights: Fans and ACs draw higher loads. Poorly charged batteries may give up during the night. Medical needs: If you have medical equipment at home like a CPAP machine, then a properly-charged inverter battery is not a convenience; it is critical. Family routines: Kids’ online classes, cooking routines, or even lighting at home depend on how prepped your battery is.That’s why the best way to charge inverter battery isn’t just about extending its life. Instead, it is about keeping your daily life uninterrupted. Final Thoughts Your inverter battery may sit quietly in a corner, often forgotten. Yet it does the heavy lifting when the power goes off. And how you charge it determines how long it will provide you with backup. Follow simple inverter battery charging tips. Pair with the Livfast inverter, which offers high-load carrying capacity, advanced micro-controller-based design, and low-voltage charging, you’ll have a system that’s both reliable and stress-free. Related Blogs Inverter Battery Health CheckReplace Inverter Battery GuideInverter Battery Life Explained FAQ’s General What is the best way to charge an inverter battery? Keep the battery in a ventilated space, allow full charging cycles, and check water levels regularly if it’s tubular. Is this Helpful? Does the Livfast battery