

Which Inverter is Best for Home Use?
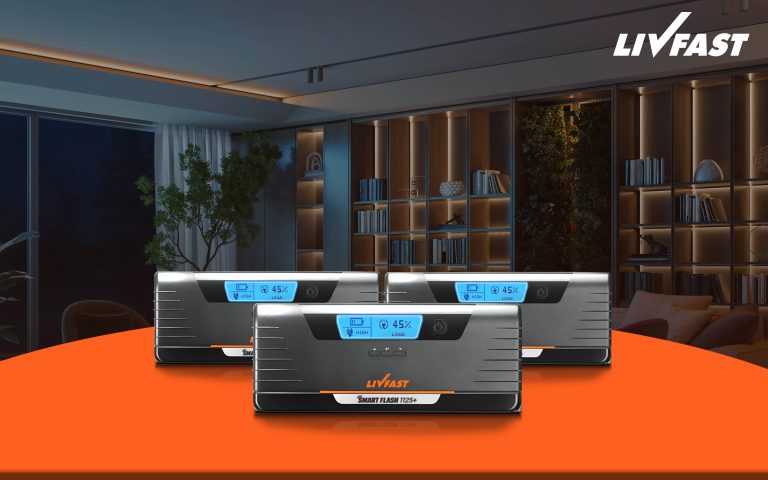
Home Which Inverter is Best for Home Use? by Every common Indian knows the pain of power cuts. It is an everyday ritual. But, for how long will this disrupt your life? Think about choosing the best inverter for home to ensure your lights stay on and fans keep spinning. And the best part, your electronics do not blow up during voltage ups. This practical guide will help you to help you decide on the type of inverter more wisely than before. Why Choosing the Right Home Inverter Matters By now, you already doubt whether all inverters are created equal or not. That is true–they are different, actually. And they suit different places. The wrong choice can: Burn sensitive electronics Fail during peak loads Waste money on oversized or inefficient systems Therefore, the best inverter battery for home is the one you pick after knowing your needs. It is the right type of home inverters that help you save both money and headaches. Types of Home Inverters and Where They Fit Here’s a quick 2025 snapshot: Use-Case at Home Best Inverter Type Why It Wins Typical Spec Range Normal power-cut backup (fans, lights, fridge, Wi-Fi) Pure-sine-wave OFF-LINE / ECO UPS Cheapest, plug-&-play, silent; switches to battery ≤10 ms 800–1500 VA, 12/24 V battery, 90–94 % efficiency Frequent long outages (4–8 h) or sensitive electronics Pure-sine-wave LINE-INTERACTIVE UPS Cleaner voltage, AVR, faster transfer ≤5 ms; doubles as stabiliser 1.1–3 kVA, 24 V battery, 95–97 % efficiency Cut grid units & store solar HYBRID (Solar + Battery) Inverter PV-MPPT + battery + grid in one; sell excess 3–10 kW, 48 V battery, 97–99 % Euro efficiency No grid at all (farmhouse/remote) OFF-GRID / Stand-alone Inverter Works independently; surge power for pumps 2–5 kW, 24–48 V, pure sine, 150 % surge for 10 s Shaded or multi-roof PV Micro-inverter system Each panel has its own inverter → shade on one doesn’t sink the string 250–400 W per module, 97 % CEC, 25 yr life How to Choose Inverter for Home Here’s a simple decision flow: Check your daily load – sum watts of fans, lights, fridge, AC, TV, computer. Decide backup hours – 2–3 hours for shortcuts, 6–8 hours for long outages. Consider future expansion – planning solar or more electronics? Choose a hybrid or modular inverter. Match battery type – lead-acid or lithium, 12/24/48 V. Efficiency & features – UPS/ECO mode, voltage stabilisation, surge protection. Avoid These Mistakes Square-wave or quasi-sine inverters → hums fans, damages LED TVs. String inverter only → can’t add batteries later without an extra charger. Central inverter (>20 kW) → overkill, noisy, costly, needs 3-phase supply. Livfast Quick-Pick Guide – Best Inverter for Home Home-scenario Livfast inverter Key specs Typical load Price-band* (₹) Why it wins 2-BHK city flat, 1-3 h cuts FLASHCHARGE+ 900-1100 VA Pure-Sine 12 V, 25 % faster charge, UPS/ECO dual-mode, 3-year onsite warranty 3 fans + 6 LEDs + 1 TV + Wi-Fi 5k – 6k Silent, stabilises voltage, safe for laptops Same as above + 165 L fridge FLASHCHARGE+ 1500 VA Pure-Sine 12 V, 1260 W peak, 90-260 Ah battery switch Add fridge + mixer + laptop 7k – 8k High in-rush for compressor, single-battery 3-4 h daily outage, desktop PC, 2 ACs High-Capacity 2-3 kVA Pure-Sine 24 V, 80-82 % efficiency, low-volt charging, MCB protection 2 ACs + PC + 8 fans + 20 LEDs 14k – 18k Built for apartments & small offices, accepts tall-tubular bank Frequent 6-8 h cuts or 2-3 kW solar SmartFlash Hybrid 3-5 kVA 48 V, MPPT solar charger, dynamic battery monitor Whole home except geyser & pump 22k – 35k One box does solar + back-up; lithium/tubular ready Large villa, 5+ kW load Heavy-Duty 5 kVA Dual-MPPT 48 V, 88 % efficiency, dual MCB, parallel up to 30 kW 2 lifts + 5 ACs + pumps + lights 40k – 50k Runs industrial-grade machinery, accepts 48 V lithium *Inverter unit only; battery & trolley extra. 30-Second Decision Tree Load < 1 kW & no solar → FLASHCHARGE+ 900/1500 VA Need AC/long backup → 2–3 kVA High-Capacity Rooftop solar now/later → SmartFlash Hybrid 3–5 kVA Whole villa or no-grid → 5 kVA Heavy-Duty hybrid Advantages of Inverter for Home Use Inverters find a special space for home use as they are designed to suit the purpose. The top advantages are as follows: Uninterrupted power during grid failures Protects electronics from voltage fluctuations Energy-efficient – reduces wastage Supports solar integration with hybrid models Conclusion Choosing the best inverter for home comes down to load, backup time, and future needs. For short outages, a 900–1500 VA pure-sine unit is ideal. For longer backups or sensitive electronics, step up to 2–3 kVA. Planning solar? Hybrid inverters with MPPT inside offer the most flexibility. At Livfast, we design inverters that charge faster, last longer, and perform reliably. Whether you need a compact city-flat solution or a high-capacity hybrid for your villa, our inverters combine efficiency, durability, and easy maintenance. With Livfast, your home stays powered, your devices stay safe, and your mind stays worry-free. Related Blogs What is an Inverter? Inverter Battery Life Explained Sine Wave vs Square Wave Inverter Parts of an Inverter FAQ’s General How often should I check my home inverter? Monthly for battery voltage, yearly for service check, and after unusual power events. Can a hybrid inverter work without solar? Yes, it functions like a normal inverter, storing energy in batteries and providing backup. What battery type pairs best with home inverters? Lead-acid (flat-plate/tubular) or lithium-ion batteries. Li-ion lasts longer, charges faster, and handles frequent cycling. How do I calculate the right inverter capacity for my home? List the appliances you want to run during a power cut, add up their wattage, and multiply by 1.25 to account for a power surge. This gives you the approximate VA rating you need. Is a pure sine wave inverter better than a square wave inverter? Yes. Pure sine wave inverters are safer for appliances, run quieter, and
Car Battery Maintenance Tips to Make It Last Longer
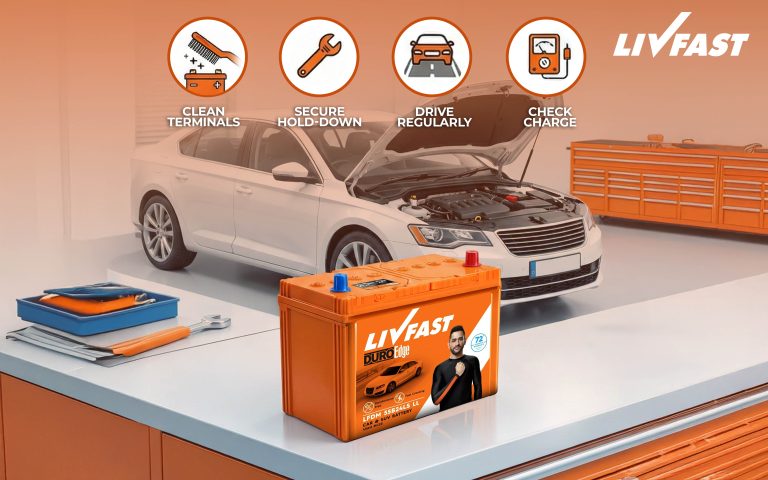
Home Car Battery Maintenance Tips to Make It Last Longer by No one likes surprises that come at a cost. And a dead battery belongs to the worst category of surprises. The moment when you were about to drive away, you ended up hunting for jumper cables. There is no other option than knowing how to take proper care of your car battery. It just takes a few simple habits that can help you prolong your battery’s life and avoid unnecessary annoyance. Read this easy guide on car battery maintenance tips that every vehicle owner should know. Why Car Battery Maintenance Matters Never think that your car battery is merely a box of chemicals. This part is very important for your car’s electrical system. If you neglect it, you will risk: Stranded mornings Premature replacements Damage to the alternator or onboard electronics Following simple car battery maintenance tips can realistically extend its life from 3 years to 5-6 years. 9 Proven Car Battery Maintenance Tips You can take the following practical actions: Action Why it matters How often Extra hack 1 Keep it CLEAN Dirt & white corrosion = hidden current drain Monthly DIY paste: 1 tbsp baking soda + water, scrub with old toothbrush, rinse, dry, coat posts with petroleum jelly 2 TIGHT is RIGHT A loose battery vibrates, internal parts crack & life drops 30% Every oil-change Shake test: glove-on hand should not move the case; tighten the hold-down clamp if it does 3 SHORT TRIPS = SLOW DEATH <10 min drives never refill what the starter took Daily Chain errands into a 30+ min run or use a smart trickle-charger weekly 4 SWITCH OFF BEFORE KEY-OUT Headlights, phone chargers, A/C fans drain battery Every parking Make a “shutdown ritual”: lights-radio-climate-seat-heater all OFF before ignition 5 CHECK THE CHARGE SYSTEM Over/under-charging kills even a new cell Yearly Free test at parts stores-13.8-14.4 V at idle; no warning lamp 6 ADD WATER (Only if NOT sealed) Low electrolyte expose plates, killing the capacity Every 3-6 months Level should cover plates by ¼ in.; top with distilled water only 7 USE A BATTERY TENDER Parasitic draw empties parked car in 2-3 weeks Whenever parked >2 weeks Clip-on maintainer keeps SOC at 80% without overcharging 8 INSULATE FROM TEMPERATURE EXTREMES Every +10°C above 25°C halves battery life; below 0°C cuts cranking power 50% Seasonal Slip-on thermal blanket keeps battery 5-7°C warmer in winter, cooler in summer 9 TEST, DON’T GUESS Impending failure shows up months before “click-click” Twice a year Digital load test; replace if CCA < 80% or voltage drops below 9.6V under load Quick Weekend Drill (15 Minutes) Even busy schedules can fit a battery check. Follow this simple routine once a month: Pop the hood, glance for cracks, leaks, or bloated cases. Disconnect the negative clamp first, clean the posts, and reconnect the positive last. Wiggle-test the hold-down bracket. Use a multimeter: 12.6 V engine-off, 13.8-14.4 V running. Log the numbers; if trending downward, schedule a professional load test. These are the main car battery maintenance tips at your service. How to Extend Car Battery Life A few extra actions make a difference: Avoid excessive short trips (<10 min). Don’t leave electricals ON when the engine is off. Keep terminals clean and corrosion-free. Maintain the recommended water level if the battery is non-sealed. Store or park in a temperature-controlled area whenever possible. These are basically how to maintain car battery tips without turning your routine into a workshop task. Signs of a Weak Car Battery Spot trouble early. If your battery shows these, take action fast: Slow engine crank or clicks when starting Dim headlights or interior lights Electrical accessories behaving inconsistently Swollen or leaking case Unusual odors Catching these early can save your battery from complete failure and help you make your car battery last longer. Cleaning Car Battery Terminals How to clean car battery terminals? One of the simplest but most effective car battery care tips: Remove the negative clamp first, then the positive. Scrub corrosion with baking soda paste and an old toothbrush. Rinse and dry thoroughly. Apply petroleum jelly to posts for protection. Repeat monthly to prevent hidden current drains. Bottom Line So, if you follow these car battery maintenance tips consistently, your battery stays healthy. Plus, you also avoid sudden breakdowns and the battery lasts significantly longer. A little care goes a long way: cleaning, tightening, monitoring, and protecting against extremes. All of this together saves thousands in premature replacements. Livfast batteries are very smartly engineered. They do charge faster and perform stronger. These last longer and make short drives and long trips excellent. Fast charge and reliable backup – perfect for city commuting. Durable designs – resist vibration and heat for longer life. Compact, safe, and maintenance-friendly – ideal for any vehicle type. Get quality checks and advanced technology with Livfast car batteries. You get energy you can count on. Related Blogs Car Battery Problems and Fixes How to replace car battery? Best Car or SUV Battery FAQ’s General How often should I check my car battery? A quick inspection every month plus a professional load test twice a year is ideal to catch issues early. Can I use a trickle charger every day? No need daily. Once a week or whenever the car is parked for over 2 weeks is enough to maintain a charge without overcharging. Are sealed batteries maintenance-free? Mostly yes. Sealed batteries do not require water topping, but you should still keep terminals clean and ensure proper charging. How often should I check my car battery? A quick inspection every month plus a professional load test twice a year is ideal to catch issues early. Can I use a trickle charger every day? No need daily. Once a week or whenever the car is parked for over 2 weeks is enough to maintain a charge without overcharging. Are sealed batteries maintenance-free? Mostly yes. Sealed batteries do not require water topping, but you should still keep terminals clean
What is a Flat Plate Battery?
Home What is a Flat Plate Battery? by You will hear the term flat plate battery a lot when shopping for an inverter battery. No matter how technical it sounds, it is actually a simple concept. You just need to break it down a little. Let us understand what it is and other related details regarding the same. No heavy engineering talk. Just clean information. What Exactly is a Flat Plate Battery? A flat plate battery is a type of lead-acid battery where the internal plates (the ones that store and release power) are flat, grid-shaped sheets. These grids are filled with a paste of lead oxide, dipped in an electrolyte, and sealed inside a plastic case. Think of the plates like slices of bread stacked together. Simple, thin, flat, and designed to release power quickly. This design makes the flat plate battery affordable, easy to maintain, and great for short bursts of backup power. But yes, this also means it’s not built for heavy-duty or deep-cycling scenarios. More on that in a bit. How a Flat Plate Battery Works Here’s a simplified version to help you understand easily : The battery has positive and negative plates that look like flat grids. These plates sit inside sulfuric acid, which acts as the medium that carries the charge. When your inverter draws power, the chemical reaction between the plates and acid creates electricity. When the power comes back, the inverter charges the battery to restore the chemical balance. No tubes. No complex shapes. Just flat plates doing the job. What Makes It Different From Other Batteries? The biggest difference is the plate structure. A tubular battery uses long cylindrical tubes. These hold the active material better, so they last longer and tolerate deeper discharge. A flat plate battery, on the other hand: Uses pasted flat grids Is lighter and cheaper Charges faster But loses material faster during repeated deep discharges That’s why a flat plate inverter battery is usually chosen for homes with short, predictable power cuts, not for solar setups or long backup hours. Where a Flat Plate Battery Works Best A flat plate battery shines in situations where: Power cuts are short (1-3 hours) You need quick charging Budget matters Space is limited The load is small or moderate Typical use cases: Home inverters for basic loads UPS systems Emergency lighting Small shops Light-duty power backup Car batteries (SLI category) Where it doesn’t shine: Solar homes Heavy daily cycling Hot rooms Long backup requirements Deep discharges every day You get the idea. It’s great for short bursts, not marathon running. Flat Plate Battery Life: How Long Does It Actually Last? A flat plate battery life is usually 3 to 5 years in typical Indian homes. But several factors play a role: Number of power cuts: More cycles = faster wear. Temperature: For every 8–10°C rise above 25°C, the battery life is reduced by nearly half. Depth of discharge: Below 50% discharge = long life. Going to 20-30% every day = short life. Charging quality: Good inverters extend life. Cheap chargers kill batteries fast. Maintenance: Yes, topping up water does matter. So if you treat it well, a flat plate battery reliably lasts 4 years in most homes. Design Breakdown Flat pasted plates: These hold the active mass. But under stress, small flakes shed off, which is why these batteries lose capacity quicker than tubular ones. Flooded or AGM electrolyte: Most are flooded types, which need water refilling. Some use AGM, which is sealed and maintenance-free. Plastic case: Lightweight, compact, but more prone to bulging if overcharged. Standard terminals: Simple top posts. Nothing fancy. That’s basically the entire design. Straightforward and tried-and-tested. Pros and Cons of Flat Plate Battery (At a Glance) Advantages Lower upfront cost Fast charging Light and compact Easy to maintain Ideal for moderate inverter loads Disadvantages Shorter lifespan Not meant for deep cycling Can lose capacity faster Needs regular watering Sensitive to heat and overcharging A flat plate battery makes sense only when your usage pattern aligns with these strengths. Who Should Buy a Flat Plate Inverter Battery? Buy it if: Your backup need is 2-4 hours Your load is basic (fans, lights, Wi-Fi, TV) You live in a city with stable power Budget matters You want a compact, low-profile unit Avoid it if: You run on solar You have long outages Your home gets very hot You run heavy loads You want a 6-8 year lifespan Where Flat-Plate Fits in Most brands offer both flat plate and tubular batteries. Flat plate versions target Indian homes that: Want quick recharge Have short but frequent power cuts Don’t want tall, bulky batteries Prefer a lower price point Some brands even use advanced paste formulations to improve life, but the fundamental design remains the same. If you want the simplest, budget-friendly option for city power cuts, a flat plate inverter battery still holds a good place in the market, especially for apartments where space is tight. How to Make a Flat Plate Battery Last Longer Just follow these simple habits: Keep it in a cool, ventilated room Don’t load the inverter at 100% Top up water every 2-3 months Don’t drain it below 50% Charge it fully after a long outage Clean terminals to prevent corrosion Use a good quality sine-wave inverter If you manage these, you can stretch the flat plate battery life close to the upper limit. Conclusion A flat plate battery is ideal if you want budget-friendly, compact, and reliable power for short, frequent outages. It works well for basic home inverters, small shops, and UPS systems. Just remember: it’s not built for deep-cycle solar use or heavy-duty applications. At Livfast, we’re committed to powering your world with batteries that charge faster, last longer, and perform stronger. Backed by advanced technology, rigorous quality checks, and a wide range of power solutions for homes, vehicles, and businesses, we make sure you never have to worry about downtime. With Livfast, you get reliable performance, dependable backup,
How to Save Electricity Using Inverter Technology?
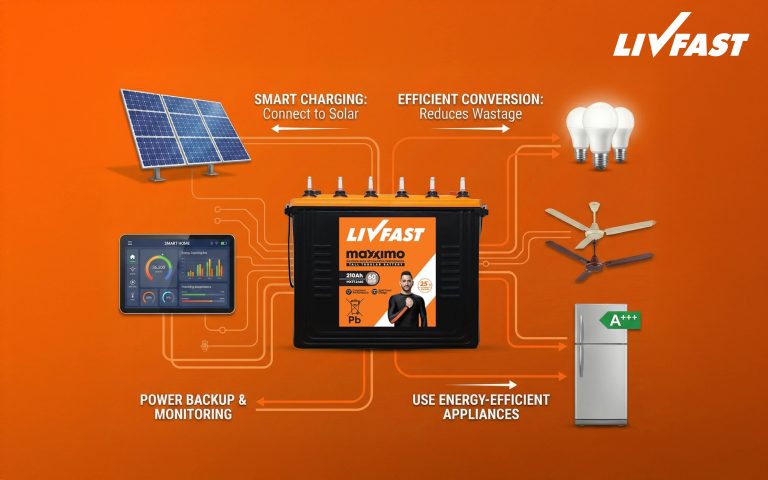
Home How to Save Electricity Using Inverter Technology? by Electricity consumption is one of the primary concerns of many families. This situation worsens with the increasing number of high-power appliances and the rise of energy prices. So, how do inverters save energy? Why do manufacturers highlight inverter technology so prominently? The answer is pretty evident: inverter devices are made to function in a more intelligent and efficient way. Thus, they help you cut electricity consumption without giving up your comfort. Here we explain how inverter technology can save electricity, how it operates in different appliances, and the reasons for you to get a modern inverter system like Livfast’s to generate significant savings over time. Why Inverter Technology Is Becoming Essential Firstly, the way traditional appliances and old-model inverter devices work is pretty simple. They power on full-throttle, and when the operation is not required, they turn off completely. This starting-stopping cycle that is done continuously not only leads to a higher consumption of electricity but at the same time, it causes more wear and tear of the internal components since the latter are under most of the load and thus, their efficiency gradually drops over time. On the other hand, modern inverter technology maintains the driver’s power by monitoring the demand of the appliance at any time. Livfast integrates artificial intelligence (AI) and Wi-Fi-enabled features in its “SmartFlash” series. These features allow users to monitor battery status, receive maintenance alerts, and even predict power cuts via a smartphone app. Thus, it optimizes charging cycles and energy use. For its solar inverters, Livfast uses Real-Time Clock (RTC) technology and Maximum Power Point Tracking (MPPT) or Pulse Width Modulation (PWM) charge controllers to maximize solar energy harvesting and optimise power utilisation based on local conditions. How Do Inverters Save Energy? Modern inverters adjust their output based on your home’s actual load, which helps avoid unnecessary electricity waste. Here are the major ways inverters reduce power usage: 1. Intelligent Power Regulation Inverter systems do not have the same output all the time like regular ones; they determine the needed power by themselves, depending on the load that has been connected. If only a few devices are turned on, the inverter will reduce its output, thereby making sure no extra electricity is used. 2. Pure Sine Wave Output for Enhanced Efficiency Pure sine wave inverters provide power that is almost identical to that of the utility grid in terms of quality. This guarantees that sensitive and heavy appliances, like air conditioners, refrigerators, and motors, use power efficiently and do not suffer from the voltage dips. Since the electrical load is lighter, these devices draw less power and their lifespan increases as well. Livfast offers pure sine wave inverters that not only stabilise the power output but also take care of the power wastage problem effectively. 3. Smarter and Faster Charging Older inverters are designed in such a way that they cannot quickly charge and, in the process, they might have to draw more current from the mains, which leads to increased power consumption. The newer inverter model that uses intelligent charging algorithms only gets the power it needs and finishes the charging cycles fast and efficiently. For example, the Livfast inverters allow the voltage to drop to a point and still be able to charge without extra power or a stabiliser. 4. Lower Conversion Loss When converting DC power stored in the battery into AC power for household use, some energy is inevitably lost. Advanced inverter designs ensure that this conversion is far more efficient, giving you more backup time without unnecessary energy loss. 5. Stable Power That Protects Appliances Voltage fluctuations force appliances to work harder and consume more electricity. Modern inverters offer the solution by being able to keep voltage and frequency at very stable levels, hence the appliances do not overwork and have the best chance of optimal efficiency. Why Inverter Appliances Consume Less Electricity If you are comparing inverter appliances with older models, understanding their operational difference sheds light on how inverter saves electricity: Traditional Appliances Operate only at full capacity Switch off abruptly and restart repeatedly Consume more energy during each startup Generate unnecessary heat and noise Lead to higher long-term electricity costs Inverter Appliances Adjust their speed based on the required performance Maintain steady operation at lower power Reduce heat generation Perform more quietly and efficiently Consume significantly less electricity This is why inverter air conditioners, refrigerators, and washing machines are known to reduce energy usage by up to 30-50%, depending on capacity and usage patterns. Livfast Inverters That Promote Energy-Efficient Living Livfast inverters are designed to be energy efficient by giving power backup that is reliable while optimising power consumption. To ensure performance are the use of pure sine wave technology, smart protection mechanisms, as well as high conversion efficiency. They are energy-efficient because of their strong load capability, stable output and effective charging systems that allow the use of energy to be minimal thus making them a good choice for those who want to keep their comfort during the reduction of power consumption. Conclusion Modern energy-saving inverters are capable of adjusting their power use more effectively, charging smartly, and providing a cleaner output, thus helping households to gradually lower their electricity consumption. The use of pure sine wave technology makes appliance compatibility and performance better, which in the long run saves energy and at the same time guarantees power delivery during local blackouts or voltage fluctuations. Consumers are assured of better appliance functioning, longer battery life, and continuous backup power, thanks to sophisticated devices such as the Livfast Power Station series. The question of whether to switch to efficient inverter technology is answered positively as electricity becomes more expensive, and thus, it is a wise and future-oriented decision to maintain stability and reduce energy expenses in the long run. Related Blogs What is an Inverter? Inverter Battery Life Explained Sine Wave vs Square Wave Inverter Parts of an Inverter FAQ’s General How do inverters save
What Are Inverter Batteries and How Do They Work?
Home What Are Inverter Batteries and How Do They Work? by Power cuts are still very common in India, and in most cases, we use an inverter to keep our houses going. However, the inverter is not the one doing all the work. The real hero is the inverter battery, which is the one that stores and supplies the electricity when you need it the most. If you have ever thought about how inverter battery works, what differentiates it from a normal one, or how long such batteries are generally, this manual explains everything in simple terms. By the time you finish reading it, you will be absolutely sure of what to pick as a backup power source for your home. What Is an Inverter Battery? An inverter battery is a specially created energy storage unit that provides power to your home after a power outage. A regular battery is only capable of short power bursts, while an inverter battery is made to supply electricity continuously for longer periods. It is compatible with repeated charging and discharging cycles, can be used to support a heavy load when necessary, and ensures the smoothness of the backup that keeps your fans, lights, and other indispensable appliances running. How Inverter Battery Works Knowing the working of an inverter battery is not so difficult a task, and it certainly helps one in making the right choice. Here is an easy explanation of the process: the battery is the stage where everything unfolds. 1. Charging When Power Is Available The inverter starts to charge the battery when the power is on. Voltage fluctuating or not, modern batteries, particularly tubular and lithium types of inverter batteries, are made to charge efficiently. 2. Taking Over During Power Cuts After the power is turned off, the inverter immediately goes to battery mode. It takes DC (direct current) from the battery and changes it into AC (alternating current), which is the one used by the appliances in the house. 3. Giving Steady, Clean Power The best inverter battery is one that can keep the voltage at a constant level and thus prevent the appliances from getting any harm. This is very important for sensitive devices like a laptop, a Wi-Fi router, a fridge, and even heavy appliances when the correct inverter is used. 4. Recharging Once Power Returns As soon as there is a power supply coming from the main source, the inverter goes ahead with charging the battery in order to prepare it for the next power failure. This is basically the cycle-storage, supply, and recharge. Inverter Battery Variations It’s not that a single type of battery would be suitable for the needs of everyone. Batteries used in inverters of different kind has its own virtues, and knowing them helps you choose more appropriately. 1. Flat Plate Batteries The best place for these is where power cuts are of short duration but happen frequently. They are fast in charging, are priced lower and are good enough for a light to medium load of the household. The major limitation of these is their shorter lifespan. 2. Tubular Batteries Tubular batteries are the best choice for a home inverter. They are engineered for: Longer backup Better deep-discharge performance A lifespan that usually stretches much longer than flat plate batteries Handling high-load appliances Livfast has stocked a variety of tubular batteries of different capacities to meet the needs of Indian power situations – perfect for homes requiring a reliable long-term backup source. 3. Gel Batteries These batteries have gel electrolytes and are thus spill-proof and maintenance-free. No need for water top-ups, besides being more stable. This makes them a good choice for customers who want a trouble-free solution. 4. Lithium Batteries Lithium batteries represent the latest and most technologically advanced line of inverter batteries. They are light in weight, extremely durable, capable of fast charging, and require absolutely no inverter battery maintenance. In addition, these are gaining popularity in contemporary homes and solar installations. Where Are Inverter Batteries Used? Inverter battery uses can be seen almost everywhere, from small homes to busy commercial areas. Home Use Fans and lights TVs and Wi-Fi routers Refrigerators (with the right inverter capacity) Computers Kitchen appliances during short outages Business and Commercial Use Shops and offices Small clinics Salons POS systems and printers Water pumps and equipment (with heavy-duty inverter systems) Livfast’s high-capacity inverter batteries are especially reliable for workplaces that can’t afford downtime. Inverter Battery Lifespan: What to Expect The life of your inverter battery depends on how you use and maintain it, as well as the type you choose. Flat Plate Batteries: around 2-3 years Tubular Batteries: 4-7 years Gel Batteries: 4-6 years Lithium Batteries: 7-12 years Inverter Battery Maintenance Tips With just a little bit of regular care, you can go a very long way in keeping your backup system dependable. These are some easy but powerful methods: 1. Top Up Water Levels Water level for lead-acid batteries (flat plate and tubular) should be checked every two months or so. It must be distilled water only. 2. Keep It Clean Interference of dust and rust on terminals with performance is inevitable. Clean them from time to time, and for prevention of corrosion put a little bit of petroleum jelly on the surface. 3. Give It Good Ventilation The battery that is charging or discharging is producing heat. Good ventilation allows continuous cooling of the battery and consequently longer life. 4. Avoid Fully Draining the Battery Battery life can be shortened due to deep discharge. Providing a recharge is always a must and especially during long blackouts. 5. Use the Right Inverter A high-quality inverter, like those from Livfast, ensures proper charging, voltage stability, and enhanced battery safety. 6. Run Occasional Load Tests It enables you to monitor the real time of the backup and also very early detection of issues. Conclusion Inverter batteries are the core power of every backup power system. Learning how inverter battery works, understanding different types of

How to Install Solar Panels: A Complete Step-by-Step Guide
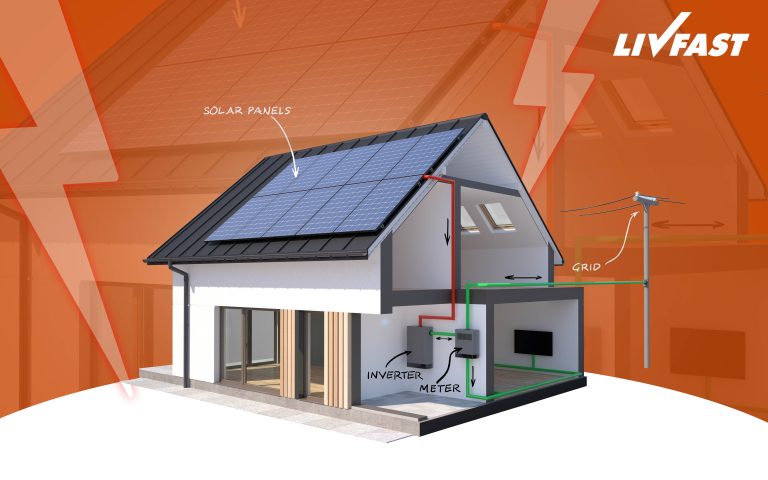
Home How to Install Solar Panels: A Complete Step-by-Step Guide by Using solar energy is one of the cheapest ways that families can do to reduce their electric bills and at the same time, decrease their dependence on the power grid. The increase in rates and the number of blackouts have triggered a massive shift in the renewable energy market; thus, many homeowners now see solar panels as a solid investment for the future. If it’s a new solar panel installation at your place, you have to be aware of the proper way of how to install solar panels so that your system remains safe and durable. This detailed manual is a perfect instrument in getting familiar with the entire installation process, starting from the home evaluation stage and up to the system testing. If you are getting ready for a professional installation or simply want to know the process, this guide on how to install solar panels will give you the means to make the right choice in terms of solar panel installation at your home. Step-by-Step Solar Panel Installation Guide Below is a detailed yet easy-to-follow step-by-step solar panel installation process to help you understand how everything comes together. Step 1: Determine Your Home’s Power Needs The first thing you want to do in installing solar panels at home is find out how much power you use per month. Six months of bills are a good representative sample for you to find out your average usage. Knowing this will tell you what capacity your solar system should be. The average power needs are: Small-sized household – 2-3 kW system Medium-sized home – 3-5 kW Large homes with heavy appliances – 5-10 kW or more The truth of the matter is that being aware of how you consume power is what saves you from the risk of wrongly sizing the solar system. Step 2: Check Your Roof or the Place Where You Will Install Before the installation, it is always recommended that you take a look at your roof or open space: Direction – The best is a roof facing the south if the location is in India. Shading – Make sure that the place chosen for the solar panel installation is not shaded by a tree, building, or any other structure. Roof angle – Close to your area’s latitude, the panels give the best result if placed at a certain angle. Roof strength – It is essential that the roof can carry the weight of the mounting structures as well as the panels. Healthy solar panel carrier poles from Livfast can withstand very strong winds and bad weather without breaking, which makes them perfect for diverse Indian homes with rooftops. Step 3: Decide the Kind of Solar Panels The choice of the production panel impacts the final power as well as the system cost. This is an important step in installing solar panels at home. Monocrystalline Solar Panels Best efficiency Also, gives better results in the dark areas Good-looking Polycrystalline Solar Panels Money saving Can be used in areas where the sun shines moderately Just a little less efficient For the sake of better performance and a more extended period of savings, the majority of residential consumers now go for Livfast’s mono PERC solar panels, which lead to better energy conversion and reliability. Step 4: Select Your Solar System Type It is wise to figure out the most suitable solar system for your needs before introducing solar panels at your residence. On-Grid System Works with the main power grid Allows the use of surplus energy to be sold back to the grid, thus lowering the bill Cannot be operated when there is a power interruption Off-Grid System Powered through solar energy and a battery without any external connection Great for places with many power cuts Battery backup should be of high quality and reliable Livfast’s solar batteries are engineered for deep discharge and provide long hours of backup. Hybrid System Solar panels, battery, and grid work together An uninterrupted supply of power is possible, along with energy savings The main reason why hybrid systems are gaining more and more popularity is that they provide a good compromise between savings and reliability. Step 5: Install the Mounting Structure The mounting assembly holds your solar panels; therefore, it should be stable and properly aligned. Tasks to be done: Setting the base structure firmly on the roof. Determining and adjusting the correct tilt angle for catching the most sunlight. Making sure the frame is facing the right direction so that the solar panels are exposed to the sunlight all day long. Confirm that all bolts and fasteners are tightly secured. Proper installation of the mountings will keep your solar panel system stable even when strong winds or storms occur. Step 6: Position and Secure the Solar Panels After the framework is done, lay the panels carefully on the structure and tighten the clamps firmly. Be sure that there is sufficient airflow below to avoid overheating. Each panel must be oriented similarly to get the utmost power output. Step 7: Join the Solar Panels Electrically The connection of the panels is done with MC4 connectors either in series to elevate voltage or in parallel to increase current. The installer determines the right configuration depending on the inverter’s specifications. The use of correct polarity is very important to prevent faults and a drop in performance. Step 8: Link the Panels with the Solar Inverter Wire the solar panel DC output to the inverter, and then the inverter to your household’s main distribution board. In the case of a hybrid or off-grid system, the battery should also be connected. Livfast hybrid inverters are capable of delivering efficient conversion, intelligent charging, and added safety. Step 9: Install the Battery (If Required) For a non-grid or hybrid system, fix the battery to the inverter through the specified terminals. Store the battery in a ventilated place and choose tubular or lithium types if you want a
Step-by-Step Guide to Replacing a Dead Car Battery
Home Step-by-Step Guide to Replacing a Dead Car Battery by There is nothing that can be as annoying as the act of turning the key and hearing only a dull click. A dead car battery can, in fact, be a silent killer of your car, thus leaving you stranded without any kind of warning, but the good news is that the procedure of changing the car battery is way simpler than people usually think. With some patience and if you have the right tools, you can make your car work again without the need for a mechanic. The simple-to-understand directions of this manual show how to replace a car battery, the required tools, and the safest way to remove and install it. As a matter of fact, you will find tips that will help you with the battery replacement process. Why Learning to Replace a Battery Is Useful A car battery is not only the one that provides power for the engine to start, but a battery also provides power for the car’s electronics, such as lights, sensors, the infotainment unit, and other safety systems. As the battery gets older, you may have a situation of slow starting, the lights flickering, or even the appearance of warning signs on the dashboard. Knowing the fundamentals of car battery replacement can make you save time and money and also reduce the risk of sudden breakdowns. Tools Needed to Replace Car Battery Make sure you have all the necessary tools before you start working. It is more secure and efficient when everything is prepared. You’ll need: A replacement battery that is compatible with the car model Gloves and safety goggles A wrench or socket set Abrasive material for cleaning battery terminals or a wire brush An absorbent cloth Vaseline or battery terminal protection spray These are the standard tools needed to replace a car battery, whether you’re a beginner or someone who has done it before. Important Safety Checks In case of an accident, these measures will save your life, and they are also the steps to take when you replace a dead car battery: Turn off the motor and remove the key Put the vehicle on the handbrake Avoid touching both the positive and the negative terminals at the same time Do not smoke near the battery Work in a ventilated area Using this car battery replacement guide will make it all a breeze if you take precautions against possible dangers. How to Replace a Car Battery: Steps to Change Car Battery Here are the steps to change car battery: 1. Find the Battery Lift the hood and see where the battery is. In general, it can be found near the front of the vehicle, either on the driver’s or the passenger’s side. If the battery has been relocated in the trunk or under the back seat by the company, then look into the manual that came with your car if you don’t know. 2. Disconnect the Negative Terminal This step matters more than anything else. Find the negative terminal (most of the time it is indicated with a “–” or a black cable). By using a spanner, remove the nut. Carefully detach the cable and separate it from the battery. It’s all about safety first: the negative terminal should be taken off before the positive one just to be on the safe side. 3. Disconnect the Positive Terminal If that is done, then move on to the positive one (If the terminal is “+” marked or the cable is red). Take it off gently. When you are figuring out how to remove a dead car battery, don’t forget that the negative terminal must be detached first, followed by the positive one. 4. Remove the Battery Clamp Generally, the battery comes with a bracket or a clamp for safety purposes. Take off the bracket by removing the screws that are holding the bracket in position and then get the screws and the bracket together somewhere safe—you will be needing them very soon. 5. Lift Out the Old Battery The majority of car batteries are more than what meets the eye in terms of weight. So, don’t forget to take it directly but at the same keep it balanced so that the acid doesn’t leak. 6. Clean the Area Use a cloth to clean the tray. A wire brush helps remove corrosion from the metal terminals. A clean surface ensures a better connection for the new battery. 7. Position the New Battery Place the new battery in the same orientation as the old one. Secure it firmly using the bracket or clamp. 8. Attach the Positive Terminal Reconnect the positive cable first and tighten it so the connection feels secure. 9. Attach the Negative Terminal Now reconnect the negative cable. It’s normal to see a tiny spark—it simply shows the circuit is complete. 10. Protect the Terminals A bit of petroleum jelly or terminal spray helps prevent corrosion, keeping the connections clean for longer. 11. Start the Car Turn the key or press the start button. If everything fires up normally, you’ve successfully completed the steps to change a car battery. Choosing a Reliable Replacement Battery A good battery, like Livfast car batteries, makes a world of difference. Choose one that not only meets your vehicle’s requirements but also provides a strong starting power, a long service life, and stable performance in any weather condition. Besides, high-quality batteries offer extra protection to your car electronics and make it less likely that you will experience sudden failures. Car Battery Installation Tips A new battery is a worthwhile investment if you follow the proper care methods: Always clean the terminals Do not leave the car standing for long periods Make sure to turn off the lights and accessories before leaving the car Occasionally, have a professional check your charging system Keep the battery in a dry place and firmly installed Conclusion It’s easy to be scared off by the idea of having to change
A Quick Guide to Inverter Battery Maintenance
Home A Quick Guide to Inverter Battery Maintenance by Inverter batteries are at the centre of any power backup system. During power outages or utility grid accidents, the inverter battery ensures a seamless energy supply to all connected appliances. So whether you’re using one for home or for large-scale heavy-duty industrial demands, an understanding of inverter battery maintenance is non-negotiable. Frequent power cuts can put excess stress on your inverter batteries, causing them to run into trouble way before their complete lifespan. Taking good care of your inverter battery during as well as post outages ensures that it lasts long. It also proves cost-effective in the long run. Inverter Battery Care Tips During Power Cuts Most contemporary general-purpose inverter batteries are tubular lead-acid batteries. Besides the usual regular monitoring, they require electrolyte refills to retain smooth charging & power dispensation qualities. Here are the most effective inverter battery care tips, especially for long power cuts : Install Inverter Battery in Ventilated Areas Lead-acid batteries tend to release hydrogen when charging or discharging. Additionally, when a battery system heats up, it deducts from the health of the battery. Installing an inverter battery in a well-ventilated space with smooth passage of air: Avoids the accumulation of hydrogen that could lead to electrical accidents. Helps dissipate heat. Extends battery life. Prevent moisture accumulation or condensation that could lead to short-circuiting. Prevents battery acid from leaking or building up. Deters corrosion. Use Low Power Appliances One of the most popular things you’ll hear about extension of inverter battery backup during power cuts is that of unplugging high-power appliances. The use of mixers, refrigerators, microwaves, induction cooktops and similar high-energy devices is advised against to maintain longer battery backup. Switching to low-power appliances that do not deep discharge can have several benefits: Less power drawn also translates to less strain on the battery. Low battery depletion allows for sustained use of essential devices like lights and fans. The battery does not run the risk of overcharging or shutting down Low heat generation prevents the eating away of your battery health Be Vigilant of Battery Water Levels Float indicators on lead-acid batteries are a periodic maintenance task which becomes more urgent during power outages. Tubular batteries make use of electrolytes in distilled water to efficiently charge and discharge. Your battery water levels need to be vigilantly monitored for several reasons: Longevity and an increased inverter battery backup during power cuts Prevention of damage to the battery plates Prevention of acid leaking and consequential corrosion Higher efficiency Long-term stability in performance Use Power Saving Modes Power saving modes (on available models) are an understated feature in sustaining battery health and getting the highest energy efficiency out of your inverter battery. Just like the power saving modes for our mobile batteries, modern inverters come fitted with “Eco” settings that allow for power conservation during electricity crises. Their functions include: Optimised power output to outlast power cuts Low energy consumption Reduced load on the inverter Contact your technician or read through your manual to activate these eco settings on your inverter. Recharge Fully Once Power Returns While optimising for low output and energy consumption during grid failures is essential, charging your inverter to full capacity once the power returns is paramount to prolong battery life. Lead-acid batteries, especially, can form lead sulfate crystals due to partial charging, which in turn adversely impacts battery life. Full charging cycles are critical for: Preventing sulfation Maximising backup time & health of battery Maximum performance and efficient power discharge Being prepared for peak demands during the next outage Common Battery Care Tips for Prolonged Battery Life Taking precautions to extend battery life during power cuts is beneficial for those experiencing frequent power outages. Additionally, a few standard inverter battery care tips can help maintain a reliable power supply irrespective of power cuts: Regular Cleaning: Keeping the terminals of your battery clean of dirt or dust prevents sparking or inadequate charging. Load Testing: Battery testing is important to ascertain whether your inverter battery retains its holding charge or has reduced in capacity Regular Servicing: Contacting a professional technician to inspect batteries or service them between 6-12 months is a healthy practice in upkeep and monitoring of battery health. Replacement: Tubular batteries tend to exhaust their capacity between 3-5 years of installation. Replacing batteries when due prevents leakage and damage to the overall inverter system. Conclusion Following a few easy, simple, and periodic habits can enhance your inverter battery’s ability to hold a charge for longer durations. You get the most output and the highest efficiency out of your device this way. For these reasons, Livfast batteries come with low maintenance design and high-performance output. They make inverter battery maintenance easy and safe. Powered with state-of-the-art technology for high-value output and zero compromise on efficiency, Livfast models are built to carry 25% extra backups for outage situations. In case your batteries have run their course, you can explore a range of battery options for a replacement on our website. Related Blogs What is an Inverter? Inverter Battery Life Explained Sine Wave vs Square Wave Inverter Parts of an Inverter FAQ’s General Is it okay to use high-power appliances on my inverter battery? Using high-power appliances exhausts your inverter battery sooner than when low-power devices like lights or fans are connected to it. To retain high inverter battery backup during power cut, it is advisable to use only low-power appliances. Should I clean the battery periodically? Cleaning your inverter battery from time to time prevents corrosion & prolongs battery life. However, ensure your familiarity with the right inverter battery care tips and use protective gear when cleaning the battery. How often should I recharge my inverter battery? After every significant discharge, your battery should be fully charged to prevent sulfation. Is it okay to use high-power appliances on my inverter battery? Using high-power appliances exhausts your inverter battery sooner than when low-power devices like lights or fans are connected to it. To retain high inverter
Effectively Troubleshooting Common Inverter Issues
Home Effectively Troubleshooting Common Inverter Issues by In a country like India, frequented by voltage fluctuations, power outages or load shedding, inverters are god-sent. The manufacture of general-purpose inverters revolutionised the power backup industry in the late 20th century. Soon, every home had a mini power station installed in some corner of the house, ready to switch into place during a power cut. Apart from providing battery backup, they help stabilise the voltage being supplied to various home appliances. We have grown accustomed to a life made convenient by the advent of inverters. Naturally, we get a little stressed when this electricity stand-in begins to malfunction. Inverter troubleshooting is just as easy and doable as owning a model. Like any other electrical appliance, it can run into trouble without notice. Understanding how to fix inverter problems is handy knowledge. It saves you panic as well as the additional expense of hiring an expert. Here are a few common inverter problems and solutions: Inverter Not Turning on Is your inverter showing error when you try to turn it on? If your inverter does not turn on the way it usually does, it can be due of the couple of following reasons: The battery isn’t connected to the inverter Wiring has been damaged Inverter’s hardware has run into an issue The battery is too weak to support turning on An internal fuse has blown up Ways to fix it: Try restarting the inverter Check the fuse/MCB for damage Make sure the battery terminals are free of corrosion or rust Get your hardware checked. Repair it in case of damage. Replace the dead battery with a new functional one Overload Every inverter owner is sure to encounter an inverter beeping problem. When one or multiple heavy-duty appliances are connected to the inverter, it can start beeping from the excess power load. Recognise that your inverter has exceeded its capacity and is bearing load far past its limit. Sometimes, attaching faulty appliances to the inverter connection can also make the alarm blare. Ways to fix it: Unplug a few appliances Check for short-circuiting in the connected appliances Inspect the wires If the beeping persists, try restarting your inverter after reducing the load. Low Battery Backup Although commonly noticed in older systems whose batteries have been strained from wear and tear, inverter batteries in new systems can drain quickly, too. Such a problem can arise due to: Faulty battery device Excessive power consumption in a short period of time Low levels of electrolytes in the tubular batteries Wear and Tear Ways to fix it: Get a faulty battery replaced with a tested functional one Reduce the number of appliances connected to the inverter Check the water levels. Replenish with electrolytes if required. Replace the old battery with new ones An Overheated System If your inverter is hot to the touch or does not cool down properly, there might be serious problems in the internal operation of the system. It’s best to tackle the issue with immediate attention. Reasons your system might be overheating: Blockages in the vents Overcharging a battery Malfunctioning or not working fan Unusually high room temperatures Internal faults in the device Ways to fix it: Clear out the vents to ensure free passage of air Replace a defective fan Move the system to moderate temperatures Disconnect appliances and let the system rest Check for visible signs of melted fuses Faulty PCB The PCB (Printed Circuit Board) is an internal hardware component in appliances that ensures the smooth functioning of all other connected parts. It is the neural network of the device and central to its proper functioning. The PCB might be damaged due to: A component having fried internally Frequent power surges Defects in the device manufacturing Choking of internal parts from dust Ways to fix it: Reset the device Replace the PCB In case of a manufacturing defect, replace your complete device If you’ve successfully done it before, clean the PCB of dust or dirt Hire a professional to look into the inverter parts Conclusion Most households encounter one or multiple of these problems during the lifetime of an inverter. Often, though, inverter troubleshooting for common problems can be managed systematically, without cause for grave concern. But in case your inverter has exhausted its lifespan, Livfast offers a variety of reliable, high-efficiency power backup solutions for you to choose your next inverter from. Fitted with cutting-edge technology, they are suited to the needs of private as well as commercial power consumers. Optimised, safe, and long-lasting, Livfast inverters charge faster and perform seamlessly at low voltages. Related BlogsWhat is an Inverter?Inverter Battery Life ExplainedSine Wave vs Square Wave InverterParts of an Inverter FAQ’s General Why is my inverter tripping? Inverters tend to trip due to power surges or from internal malfunctioning of the PCB. Sometimes it is accompanied by a burning smell or flicker of the display. Check the PCB of your inverter. In case you’re not a technician, contact one promptly. Should I perform health checkups on my inverter? Unless errors in functioning are visible, inverters do not require frequent health checkups. Monitoring the water level from time to time and a full servicing every 6-12 months is adequate to sustain the battery’s health. Can I top up my battery with water myself? Yes. It’s normal to monitor the electrolyte level of your battery yourself and pour distilled water when the system needs it. Make sure to wear gloves or avoid any physical contact with the liquid. Why is my inverter not working even when the power is available? If your inverter is not working, the most common cause is a battery issue. A weak or damaged battery can prevent the system from starting. In many cases, the root problem is an inverter battery not charging due to loose terminals, low electrolyte levels, a faulty charger, or a worn-out battery. Check the wiring, ensure the battery water levels are correct, and restart the inverter. If the battery still doesn’t charge,

How to Choose the Right Solar Battery Capacity?
Home How to Choose the Right Solar Battery Capacity by People think that installing solar is the only complex task when it comes to setting up the system. They forget half the battle. The other half? Getting the right solar battery capacity to connect to the system. Too small, and you will run out of power at night. Too big, and your wallet takes a hit. The trick lies in you conjuring up just the right size for your home, lifestyle, and daily energy needs. Read on to know it clearly in easy steps with actionable advice inside this solar battery sizing guide. Solar Battery Capacity We all know that a solar battery’s main function is to store electricity that the solar panels of that setup generate. So, in the absence of sunlight, the system gives you access to power. kWh (kilowatt-hour) is the unit that measures the amount of power the battery can hold. Find answers to the following to get the right solar battery capacity: How much energy does your home consume daily How long do you want the battery to last during outages What is the type of battery and its usable energy (Depth of Discharge/DoD) What is your solar panel output Think of it like a water tank. You need enough to keep your taps running during dry days, but not so much that half of it never gets used. How to Choose Solar Battery Getting the perfect solar battery capacity for your place can become very easy if you know how to go about it. Step 1: Know Your Daily Energy Use Your electricity bills are what you need first up. Add the total units that you consumed over the past 12 months. You will now have to divide the sum by 365. Alternatively, what you can do is you can use a plug-in energy meter for a week and scale up. You have a baseline for how big your battery needs to be. Step 2: Decide Backup Duration How long should the battery last if the grid goes down? Location Typical autonomy Urban home 1 day Rural home or extended outage 2-3 days Longer backup means a bigger solar battery capacity. Step 3: List Your Critical Loads You do not use everything in your home, all the time. So, it is a relief and you can focus on the essential ones: Fridge Fans LED lights Wi-Fi/router TV Add their power rating × hours of use to get critical kWh. Example: 6 kWh/day for essential loads in a 3-BHK home. Step 4: Pick Battery Chemistry and DoD Different battery types give different usable energy: Battery Type Usable DoD LiFePO₄ 90% Lead-Carbon / Lead-Acid 50% A 10 kWh LiFePO₄ pack at 90% DoD gives 9 kWh usable. The same size lead-acid battery gives only 5 kWh usable. Note: Consider a higher DoD; it will require a smaller pack and claim a longer lifespan. Step 5: Apply the 20% Buffer Rule Add a 20% buffer to cover inefficiencies and temperature. Battery gross kWh = (critical loads × autonomy days) ÷ DoD × 1.2 Example: 6 kWh × 1 ÷ 0.9 × 1.2 ≈ 8 kWh This is your target solar battery capacity. Step 6: Consider Solar Hours and Grid Interaction Indian roofs get ~5-5.5 peak sun hours ~70% of household consumption happens after 6 pm Your battery should cover non-solar hours. If you want zero grid import at night, size it accordingly. Rule of thumb: 1 kWh battery needs ≈ 1.3 kW solar array to recharge in a day. Step 7: Modular vs Single Battery Start with one module of 5-8 kWh and expand later. Modular systems allow: Easy upgrade as consumption grows Flexible placement Longer system life High-voltage platforms or 48 V systems are ideal for future stacking. Quick Formula Recap Gross Battery kWh = (Critical load kWh × autonomy days) ÷ DoD × 1.2 Example for LiFePO₄, 1-day autonomy: 6 kWh ÷ 0.9 × 1.2 = 8 kWh → one ~9-10 kWh pack works perfectly. Types of Solar Batteries Type Best Use Cycle Life Cost (₹/kWh) LiFePO₄ / LFP Daily cycling, home, fire-safe 6,000-10,000 14k NMC / NCA Li-ion Space-tight, high power 4,000-6,000 16k Lead-acid FLA Low-cost, low-use 300-700 6k Lead-acid AGM / Gel Small UPS, no maintenance 500-1,200 8-9k Flow (Vanadium Redox) Long-duration commercial 12,000-15,000 22k Tip: LiFePO₄ is the go-to for most homes today. Lead-acid only for low-use or budget setups. Flow batteries are for long-duration commercial use. How to Increase Solar Battery Life Avoid deep discharges regularly Keep temperature stable: Li-ion batteries lose efficiency above 45 °C Use proper charging: Match solar array size to battery Modular setup: Rotate packs or stack smaller batteries A well-maintained battery can last 10-15 years. Common Mistakes to Avoid Buying too small → lights go out, fridge stops Oversizing → unnecessary cost, underused capacity Ignoring DoD → real usable energy much less than rated Not checking solar array output → battery will not recharge fully Conclusion Start with daily energy use → pick critical loads → decide autonomy → factor in battery type → add 20% buffer → modularise. You can keep: LiFePO₄ as the default home choice in 2025 Lead-acid survives only in niche and low-use scenarios Keep a check on the size of the solar battery to avoid any power interruptions. The right size will further protect your investment and save any over expenditure. Related Blogs Advantages of Solar Panels How Solar Panels Work? Do Solar Panels Work at Night? FAQ’s General How do I calculate the solar battery capacity for my home? Solar battery calculation is easier than you expect. Add up critical loads in kWh, decide backup days, adjust for Depth of Discharge, and add 20% buffer. That gives the gross solar battery capacity you need. Can I use a solar battery for both backup and peak-shaving? Yes. You can size the battery to cover critical loads during outages and store excess solar energy for night use. Adjust kWh according to